
Packing Tips for Books During a Move: Step-by-Step Guide

Moving a book collection can feel overwhelming for book lovers, but with the right preparation, supplies, and process, you can protect every spine, page, and fragile corner from damage. Whether you’re relocating across town or placing your library into temporary storage, these proven packing tips will save you time, money, and stress while keeping your books in perfect condition.

The Importance of Special Care for Books During a Move

Books might seem sturdy, yet paper is surprisingly fragile. Too much weight on top, shifting during transport, or moisture can crack spines, tear dust jackets, bend pages, or crush corners in seconds. One poorly packed box can ruin an entire shelf of treasured editions. Done correctly, though, your books will arrive at the new house exactly as you left them—ready to slide onto fresh shelves.

Step 1: Gather the Right Packing Materials and Supplies

Start with quality materials; this is not the place to skimp.

  • Small to medium book boxes (1.5–2.0 cubic ft). These purpose-built cardboard boxes are the gold standard because they keep weight manageable.
  • Strong packing tape and a tape gun
  • Unprinted packing paper (newsprint) or acid-free tissue for valuable books
  • Bubble wrap for first editions, signed copies, or fragile items
  • Permanent marker for labeling every side and the top
  • Optional: sturdy suitcases or plastic bins with lids for extra protection

Avoid giant wardrobe or dish-pack boxes—once filled with books, they become impossible to lift safely.

Step 2: Sort and Declutter Your Book Collection First

Before you touch a single roll of packing tape, sort everything. This step alone can dramatically reduce your moving costs.

  1. Pull all books off the shelves and categorize: hardcovers, paperbacks, oversized art books, rare editions, children’s books, cookbooks, etc.
  2. Decide what stays and what goes—donate, sell, or recycle duplicates and titles you no longer love.
  3. Separate fragile or high-value items that need individual wrapping.

Many book lovers discover they own three copies of the same novel. Letting go now frees space and lightens the load for movers.

Step 3: The Three Best Ways to Arrange Books Inside the Box

There are three safe methods. Choose one (or mix them) depending on the type of book.

Method A – Flat Layers (Most Common and Efficient)

Lay books flat, alternating spine direction with each layer. Place heaviest hardcovers on the bottom, paperbacks on top. This distributes weight evenly and protects spines from pressure.

Method B – Upright “Library Style”

Stand books the way they sit on shelves, spines facing outward toward the box flaps you’ll open first. Pack tightly so nothing shifts. Perfect for uniform-sized paperbacks.

Method C – Spine-Down Protection (Best for Fragile or Valuable Volumes)

Place each book spine toward the bottom of the box, pages facing up. The strongest part of the book takes the impact, and the pages stay closed during movement.

Never pack books spine-up with pages facing down—that’s the fastest way to crack spines when boxes stack in the truck.

Step 4: Pack Fragile and Valuable Books Like a Professional

  • Wrap first editions, leather-bound volumes, or signed copies individually in acid-free tissue or soft packing paper, then add a layer of bubble wrap.
  • Use small boxes or even a hard-shell suitcase for your most precious items.
  • Fill every gap with crumpled paper so nothing moves even an inch.
  • Label clearly on all sides: “FRAGILE BOOKS – THIS SIDE UP.”

Step 5: Handle Oversized and Odd-Shaped Books Separately

Coffee-table books, art folios, and large reference volumes need special care:

  • Lay them flat in medium or large flat boxes (picture/mirror boxes work well).
  • Limit to one or two per box with generous padding between layers.
  • Add cardboard dividers or extra bubble wrap to prevent corners from crushing.

Step 6: The Complete Step-by-Step Packing Process

  1. Reinforce the bottom of every book box with several strips of packing tape.
  2. Add a 2-inch cushion of crumpled packing paper.
  3. Load books using one of the three methods above.
  4. Fill all remaining gaps and spaces with more crumpled paper—no empty spots allowed.
  5. Top with another protective layer of paper.
  6. Close flaps and secure with packing tape.
  7. Label the top and at least two sides with contents (“Sci-Fi Paperbacks,” “Cookbooks,” “Fragile Art Books”) and arrows showing “THIS SIDE UP.”
  8. Note the destination room (“Office,” “Kids’ Room,” etc.).

Step 7: Alternative Containers When You Run Out of Book Boxes

  • Rolling suitcases: Line with a trash bag, pack flat using the methods above, and wheel your library straight to the truck.
  • Plastic bins with tight lids: Excellent for homes with humidity concerns or long-term storage.
  • Mixed boxes: Only combine books with soft items like clothes or towels if books go on the bottom, and every gap is filled.

Step 8: Load and Unload the Moving Truck Correctly

  • Place book boxes near the cab of the truck where there’s less bouncing.
  • Stack the heaviest boxes on the bottom and the fragile ones on top.
  • Never stack more than three or four high unless you have a shelving system.
  • Move book boxes into the new house first so they aren’t exposed to extreme heat or cold.

Step 9: Final Moving-Day Checklist for Books

  • Every box under 50 lbs
  • All gaps filled and contents secure
  • Fragile items double-wrapped in bubble wrap or paper
  • Boxes labeled on top and multiple sides with contents and orientation
  • Master inventory list of how many boxes per category
  • Valuable collections in separate, clearly marked containers
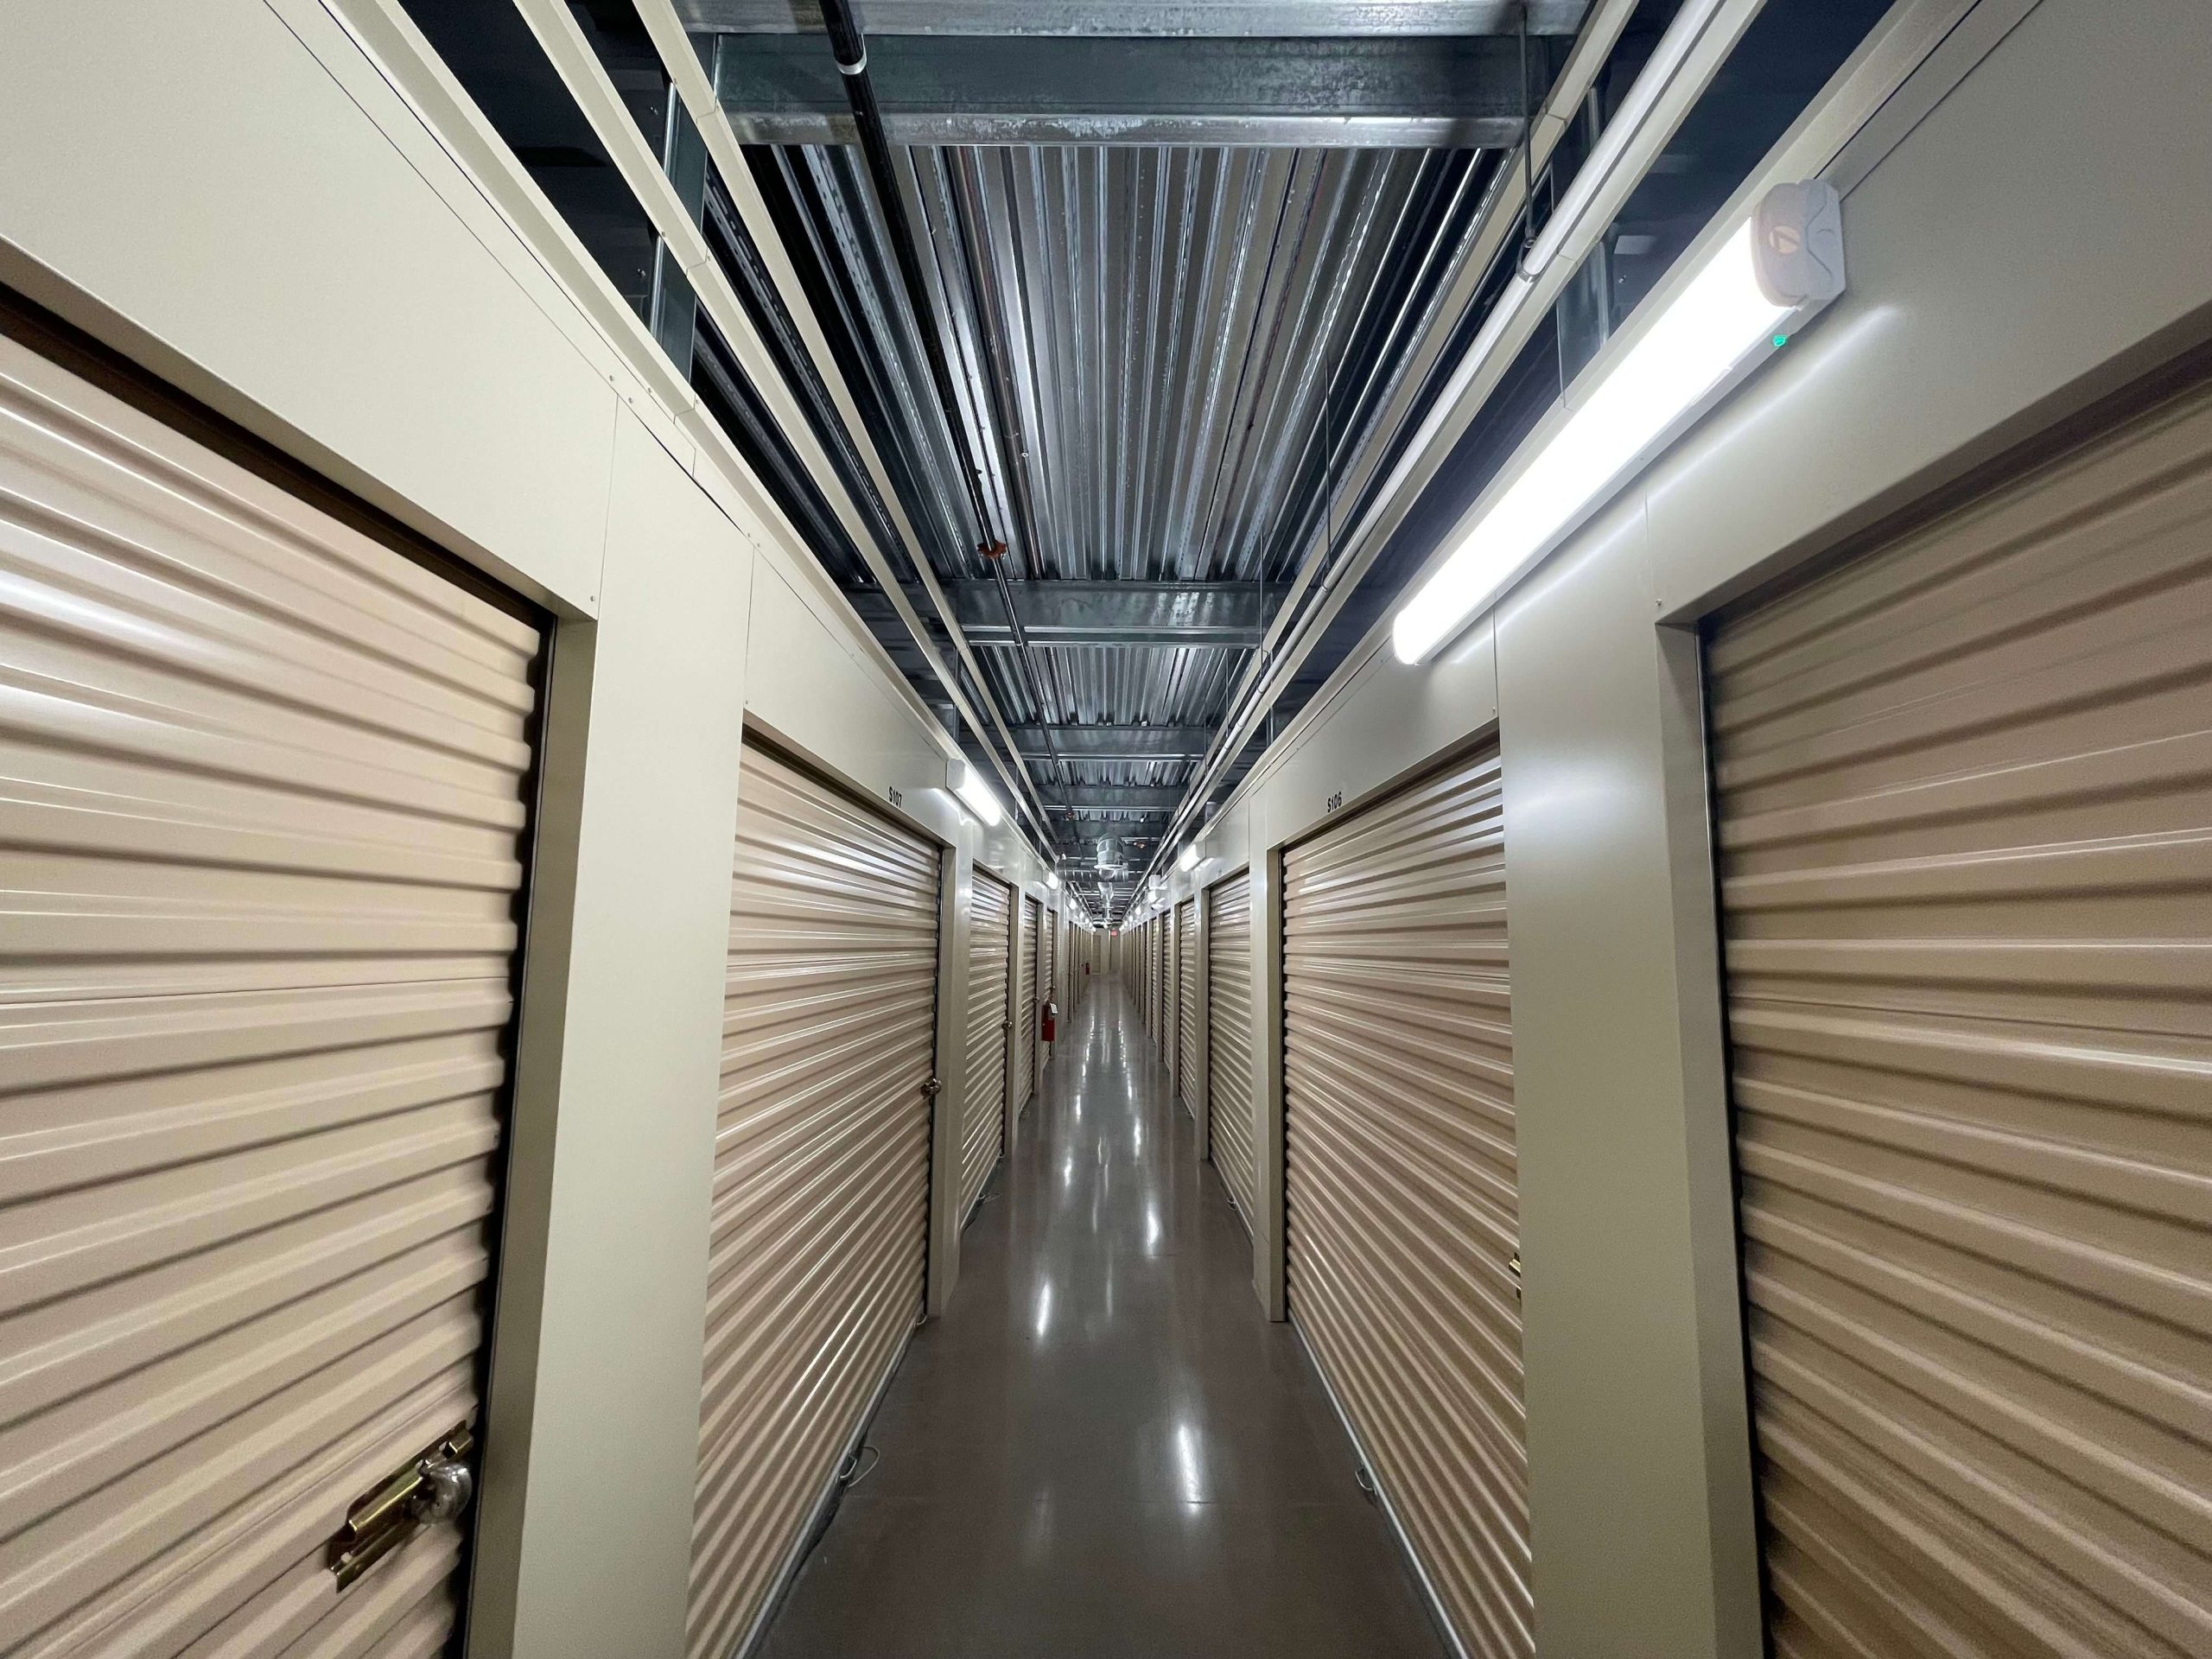
Packing Tips for Books During a Move

Bonus Tips from Professional Movers and Book Lovers

  • Use a luggage scale to check weight as you pack—50 lbs is the safe maximum for most people.
  • Photograph your most valuable shelves before disassembling; it helps with insurance claims if anything goes wrong.
  • If shipping books instead of using movers, USPS Media Mail is usually the cheapest option for standard titles.
  • For family moves, let each member pack and label their own childhood favorites—it reduces stress and gives kids ownership.

Tips for Moving Rare or Valuable Books

When dealing with rare or valuable editions, take extra care to organize every item before packing. Wrap each in protective paper, distribute the weight evenly in the boxes, and clearly mark the contents. Consider insurance for high-value shipments and explore long-distance shipping options. Even a small mistake at the end of the moving process can damage something priceless, so a bit of extra effort pays off. Proper planning ensures your collection stays in order and avoids unnecessary stress during publishing or relocation logistics.

Unpacking and Storing Books

Once at your new home or storage space, unpack strategically. Place boxes in order of priority, with fragile or high-value books on top. Organize shelves carefully, distribute books by category or size, and take a bit of time to ensure everything is in its proper place. Proper unpacking improves efficiency and prevents damage over time. At the end of the process, you’ll see how a little planning and attention to things can turn a chaotic move into a smooth, stress-free experience.

Conclusion

Moving a book collection doesn’t have to be stressful. By following these packing tips, using the right materials, and taking time to properly organize and distribute weight, you can ensure your books arrive safely. Whether it’s a lot of paperbacks, rare editions, or treasured volumes, a bit of preparation at the start saves someone from dealing with damaged or disorganized shelves later. From start to finish, keeping your content in order, exploring packing options, and focusing on efficiency guarantees a smooth move and preserves your beloved library for years to come.

Simplify Your Book Storage with McDowell Mountain Community Storage

If you need a safe, convenient place to store your books during a move or while decluttering your home, McDowell Mountain Community Storage has you covered. Our clean, secure units make it easy to organize and protect your book collection, whether it’s a few boxes of paperbacks or a lot of rare and valuable volumes.

Don’t wait—contact McDowell Mountain Community Storage today to reserve the perfect storage unit in Scottsdale, Arizona, and keep your books safe, accessible, and in perfect condition.

Frequently Asked Questions

What supplies do I need to pack books?

You’ll need small to medium sturdy boxes, packing tape, unprinted packing paper or tissue, bubble wrap for fragile books, and a permanent marker for labeling.

Should I wrap books individually?

Yes, especially for rare, valuable, or fragile books. Wrapping them in tissue or bubble wrap protects the covers and pages during transport.

How do I protect book covers during a move?

Use packing paper or bubble wrap around each book or layer of books, avoid stacking too many heavy books on top, and make sure boxes are tightly packed so books don’t shift.

How should I pack heavy books?

Place heavy books at the bottom of the box, lay them flat in layers, and avoid overloading boxes. Use small to medium boxes so they are easy to lift and carry.

Are there special boxes for valuable books?

Yes, small book boxes, plastic bins with lids, or hard-shell suitcases work well for valuable books. Always pad the contents and clearly label them as fragile.
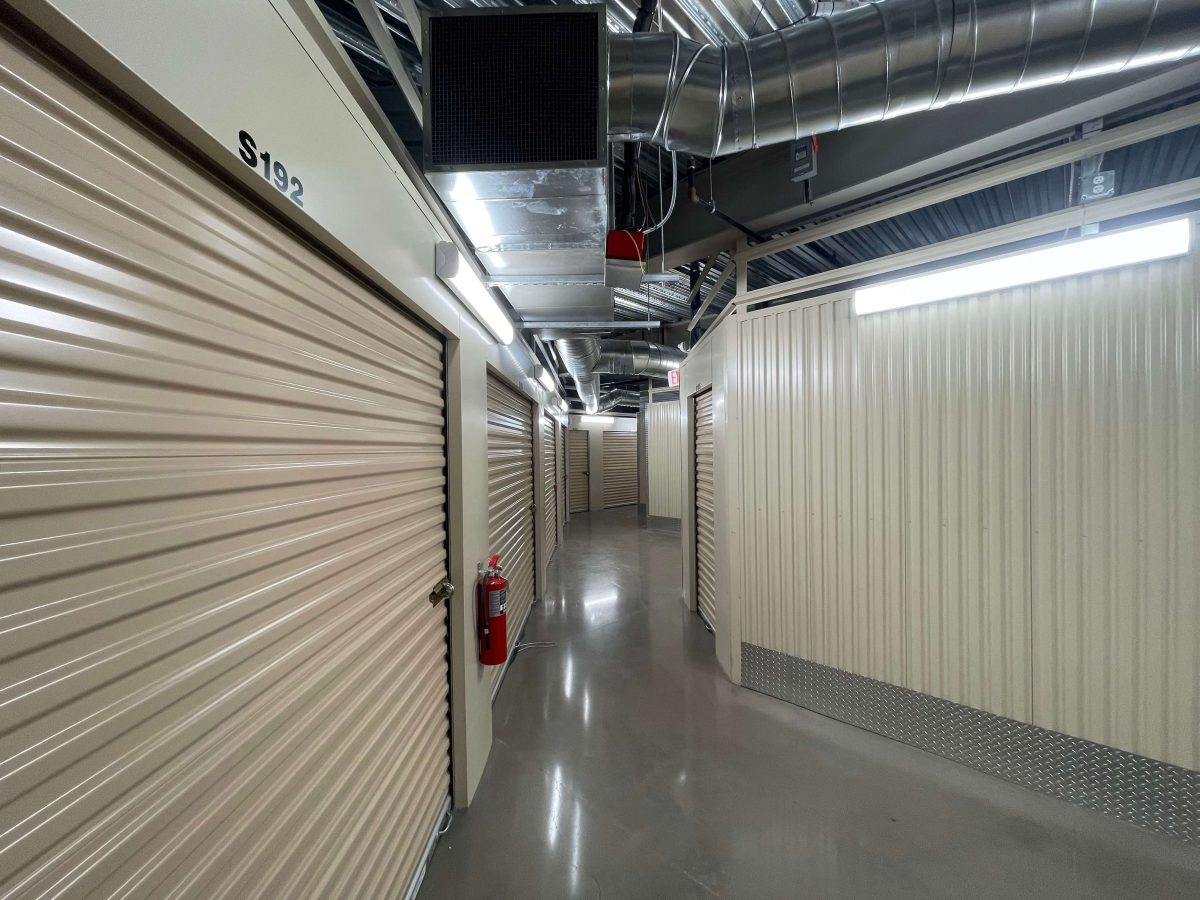
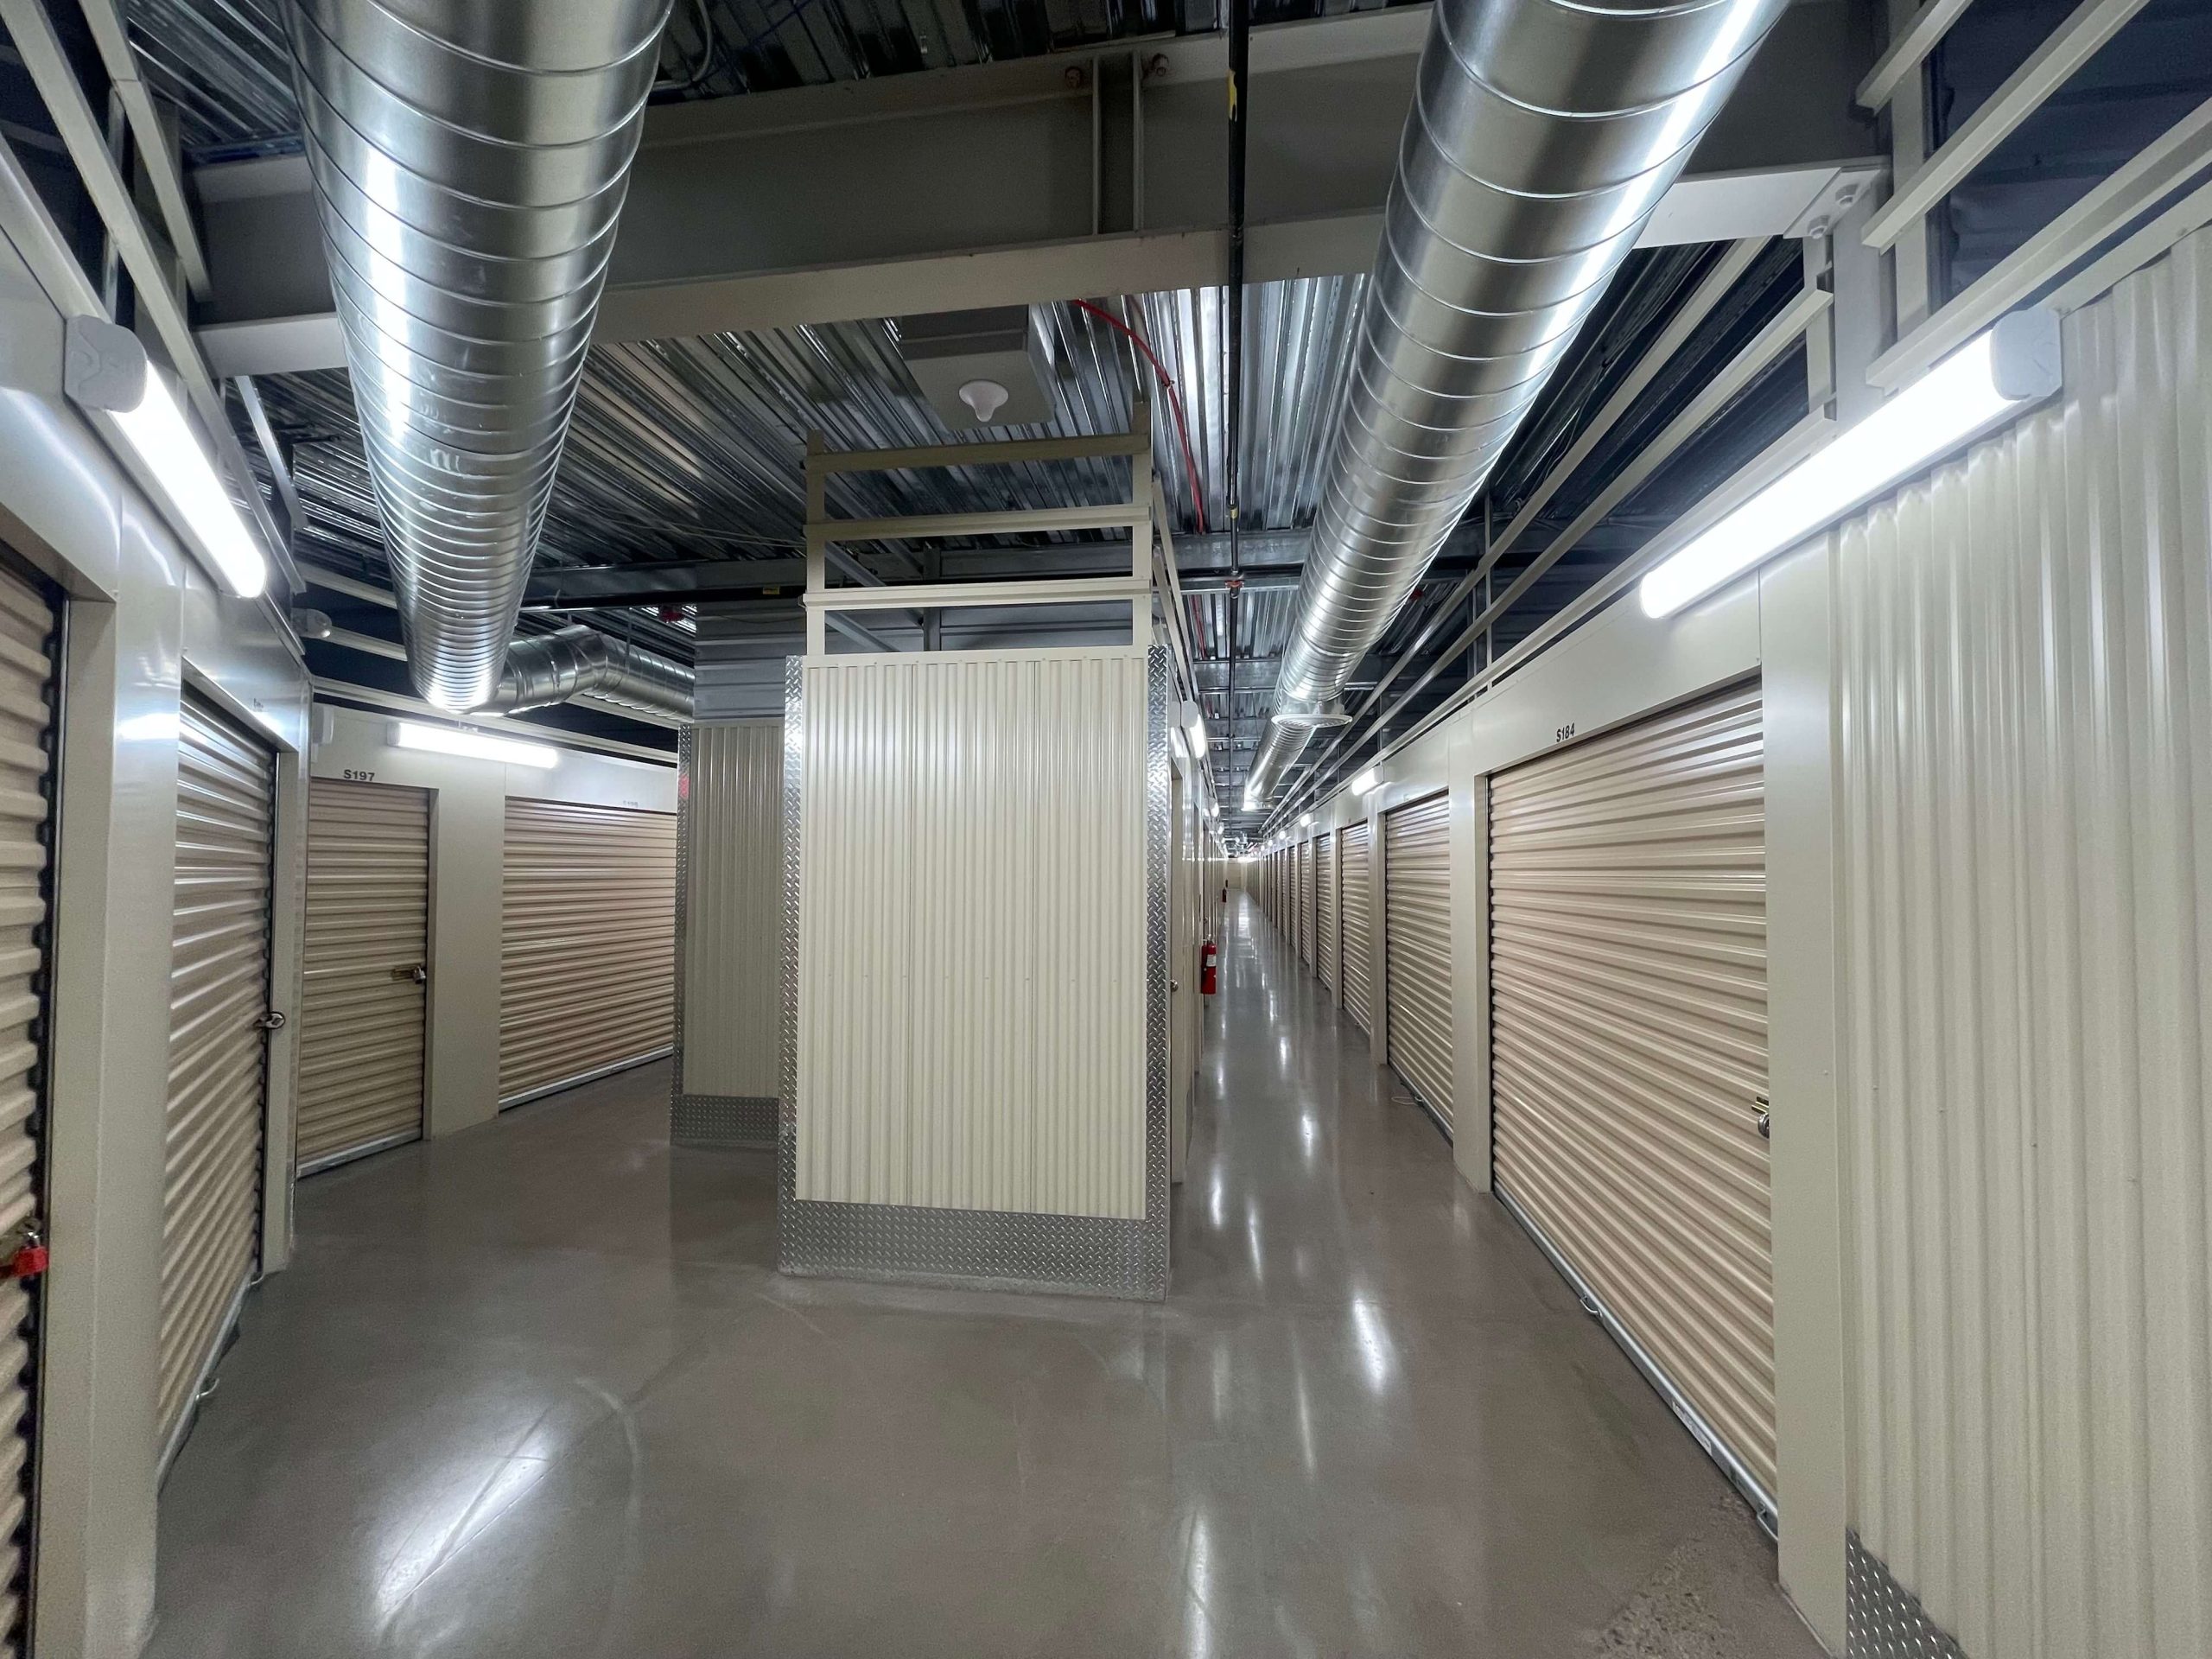
Storing a Refrigerator in a Storage Unit — What You Need to Know

Storing a refrigerator properly can save you money and prevent costly damage when you move, renovate, or downsize. Whether you have one fridge, multiple refrigerators, or a large side-by-side model, the preparation and storage process is the same. Follow this step-by-step guide to protect your appliance from mold, mildew, odors, rust, and physical damage while it’s in a self storage unit.

Preparing the Refrigerator for Storage

Preparation starts at least 48 hours before you move the appliance. First, unplug the refrigerator and freezer from the wall. Consume or relocate all food and perishables. Remove ice from the icemaker and any ice buildup in the freezer. Empty water from the dispenser reservoir and drip tray (many modern fridges have a drain pan underneath—empty that too). This early start gives the appliance time to reach room temperature and prevents trapped moisture from turning into a bigger problem later.

Cleaning and Defrosting

Never store a wet fridge. Begin by fully defrosting the freezer—leave the doors open and place a towel on the floor to catch any melting ice and water. Once defrosting is complete, clean every surface: interior walls, shelves, drawers, door gaskets, and compartments. Use a mild solution of warm water and baking soda (two tablespoons per quart of water) or a non-abrasive appliance cleaner. Avoid bleach or other harsh chemicals, as they can damage plastic or leave lingering odors. Wipe every surface dry with a clean towel, then leave the doors open for at least 24 hours in a well-ventilated space to ensure no moisture remains. Moisture is the number one enemy that leads to mold and mildew during storage.

Removing Perishable Items

Even tiny traces of food can cause major odor and mold issues. Double-check all compartments, drawers, crispers, and door bins. Remove shelves and drawers if possible, clean them separately, and wrap them to prevent breakage during transport. Discard anything that might spoil, leak, or attract pests. A single forgotten yogurt container can ruin the entire interior after months in storage.

Securing Doors and Shelves

Loose doors and shelves are a recipe for damage during transport and storage. Remove adjustable shelves and drawers, wrap them in moving blankets or bubble wrap, and pack them separately or tape them securely inside the main compartment. For the doors, use strong painter’s tape or rope to keep them closed during the move, but never tape the gasket directly—it can tear. Once the refrigerator is in its final place in the storage unit, you will leave the doors slightly open for airflow (more on that later). Cardboard or a purpose-made appliance strap works better than tape for long-term securing during the actual move.

Choosing the Right Storage Unit

Not all storage units are suitable for appliances. Choose a reputable self-storage facility that offers climate-controlled units, especially if you live in an area with high humidity or extreme temperature swings. Standard drive-up units can work in mild, dry climates, but temperature fluctuations and humidity above 60% dramatically increase the risk of rust, mold, and compressor oil degradation. A climate-controlled unit maintains a temperature between 55–80 °F and humidity below 55%, ideal for refrigerator storage. Verify that the unit size can accommodate your fridge upright with at least 2–3 inches of space on every side for airflow.

Optimal Placement Inside the Storage Unit

Always transport and store refrigerators upright. Laying a fridge on its side can cause compressor oil to flow into the cooling lines, which may ruin the unit when you restart it. Place the refrigerator on a flat, level surface—use plywood or a pallet if the storage unit floor is bare concrete. Position it at least 2–3 inches away from walls and other items to allow airflow around the coils and condenser. Never push it flush against the back wall; restricted airflow can trap heat and moisture.

Temperature and Humidity Considerations

Even in climate-controlled storage units, small fluctuations happen. The biggest threats are high humidity (which promotes mold) and freezing temperatures (which can crack plastic parts and rupture water lines). Climate-controlled units are strongly recommended in most regions. If you must use a non-climate unit, add silica gel packs or commercial moisture absorbers inside the fridge and freezer compartments, and place a dehumidifier bucket in the storage unit itself.

Covering and Protecting the Refrigerator

Once the fridge is clean, dry, and in position, protect the exterior from dust and accidental bumps. Use a breathable refrigerator cover or an old cotton sheet—never plastic sheeting or tarps that trap moisture. If you don’t have a cover, prop the doors open 1–2 inches using a wooden block or a dedicated fridge door prop. This simple step ensures constant ventilation and prevents the stale, musty odor that develops in completely sealed appliances.

Periodic Maintenance During Storage

Visit your storage unit every 2–3 months if possible. Check for any signs of moisture, mildew, or pests. Wipe down the interior with a dry cloth if needed, replace the moisture absorbers, and verify that the doors remain propped open for airflow. A five-minute check-in can prevent hundreds of dollars in damage. If you notice any odor when you open the unit, place fresh baking soda boxes or activated charcoal inside to absorb it.

Tips for Reinstalling After Storage

When you’re ready to bring the refrigerator back to your house, remove the cover and door props. Inspect the power cord and plug for damage. Let the appliance stand upright in its new location for at least 24 hours (longer if it was transported on its side) before plugging it in—this allows compressor oil to settle back into place. Clean the interior one final time, reinstall shelves and drawers, and plug it in. If everything was done correctly, your fridge should start up without issues and be ready to keep food cold again.
Best Way to Store a Refrigerator in a Storage Unit

Conclusion

Storing a refrigerator properly requires careful planning and attention to detail, but the process can be simple if you organize each step in the right way. Prioritize safety by unplugging the appliance, removing perishables, and handling shelves and doors carefully. Thoughtful packing and securing of all removable parts ensures nothing shifts or breaks during transport. Protect the interior from moisture and odors, and choose a storage unit that maintains a stable temperature and humidity. By following these steps, you can keep your refrigerator in top condition and safeguard your investment. With proper preparation, the right placement, and regular checks, your fridge will stay clean, functional, and ready for use whenever you need it—making the entire storage process smooth, secure, and stress-free.

Find the Right Storage Unit for Your Refrigerator

If you need help storing your refrigerator safely and efficiently and are looking for a climate-controlled storage unit in Scottsdale, McDowell Mountain Community Storage can provide the perfect solution. We offer a variety of unit sizes to fit everything from a compact fridge to a large side-by-side model. Choosing the right size ensures your appliance stays secure, organized, and protected from damage during its time in storage.
Don’t wait—contact McDowell Mountain Community Storage in Scottsdale today to get all the details and find the ideal unit that meets your needs and keeps your refrigerator in top condition.

Frequently Asked Questions

How do I prepare a refrigerator for storage?
Unplug the fridge, remove all food, empty ice and water, and let it reach room temperature.
Should I clean the refrigerator before storing it?
Yes, clean all surfaces with a mild solution and make sure it’s completely dry to prevent mold and odors.
Is it necessary to defrost the refrigerator before storage?
Yes, defrost the freezer completely and remove all ice to avoid water damage and mildew.
Can a refrigerator be stored upright or sideways?
Always store a refrigerator upright. Laying it on its side can damage the compressor.
How long can a refrigerator be stored in a storage unit?
Refrigerators can be stored for months or even years if properly prepared and stored in a climate-controlled unit.
Should I leave the refrigerator door open or closed during storage?
Leave the doors slightly open (1–2 inches) to allow airflow and prevent odors.
How do I protect the refrigerator from dust and dirt?
Use a breathable cover or an old cotton sheet to keep dust off while still allowing ventilation.
Is it safe to store a plugged-in refrigerator in a storage unit?
No, always unplug the refrigerator before storage for safety and to prevent electrical issues.
How do you protect the exterior of a stored refrigerator?
Place it on a flat surface and cover it with a breathable sheet or fridge cover to prevent scratches and dust buildup.
What materials can be used to cover the refrigerator?
Use breathable fabrics like cotton sheets or purpose-made refrigerator covers to protect your things inside and outside the fridge. Avoid plastic or tarps that trap moisture.

Purse Storage Ideas for Home or Storage Units

Effective Purse Storage Ideas for Homes and Storage Units

At McDowell Mountain Community Storage, we understand how important it is for our customers to keep purses, handbags, clutches, and bags in excellent condition. Whether they’re displayed in a bedroom closet, neatly arranged on a bed during sorting, carefully stacked on a shelf, stored behind a door, or secured inside one of our climate-controlled storage units. Our goal is to help anyone with a handbag collection create an organization system that is tidy, accessible, and optimized for long-term preservation. We know that the right purse organizer, combined with clever placement and thoughtful handling, can make a significant difference in maintaining the structure, color, and longevity of every piece.

Below, we share our most effective purse storage ideas for home or storage units, built on years of hands-on knowledge managing personal items, accessories, and household goods of all sizes, materials, and value levels. By guiding customers on how to protect the back of each bag, prevent accidental compression when they stack items, and choose organizers that support the shape of each bag, we help ensure that every handbag remains in ideal condition for everyday use or long-term safekeeping.

Purse Storage Begins with Clean, Protected Foundations

Before arranging purses, bags, wallets, or clutches on a shelf, rack, or in cubbies, ensure the surfaces are clean. In our experience, cleanliness prevents long-term damage to handles, fabrics, leather, and hardware. At home, wiping down shelves, drawers, or bins ensures that each purse or handbag rests on a dust-free base. In our storage units, we maintain high standards of cleanliness to protect our clients’ items from dust and particles that might accumulate on bag materials over time.

As part of initial preparation, we encourage customers to empty all handbag content and evaluate the items inside—jewelry, hats, accessories, and things that could scratch or deform the interior lining. When items are removed, it becomes easier to categorize, sort, and label boxes or bins later. Having a clean starting point helps maximize both space and protection.

Thoughtful Selection of Storage Spaces Enhances Preservation

Choosing the right place to store purses is one of the most critical factors in long-term preservation. At home, closets offer versatile options, as shelves, wall hooks, racks, drawers, baskets, and boxes can be combined to create a personalized purse organization system. In a bedroom, a top shelf above shoes or clothes is often underused; placing handbags there can free up closet space while offering easy access.

Within our facility, we provide storage units designed to maintain stable conditions, protecting purse materials—especially leather and suede—from heat, moisture, and light exposure. Customers storing large numbers of handbags or extensive collections often benefit from climate-controlled spaces, as temperature fluctuations can warp bag shapes or fade colors. By selecting the right storage environment, our customers help ensure their handbag collection remains neat, compact, and display-ready.

Strategic Use of Dividers, Bins, and Baskets Encourages Structure

Shelf dividers, bins, and baskets play a vital role in keeping a handbag collection tidy. When purses sit upright and separated, they maintain their shape and avoid flattening. We have seen many effective ways to use these organizational tools: shelf dividers can keep bags in neat rows; bins can be categorized by size, material, or color; and baskets can help sort less frequently used handbags while keeping them accessible.

For customers storing purses in our units, we recommend using breathable bins rather than sealed plastic boxes, which can trap moisture. Structured dividers or racks inside these bins help keep each bag upright. When bins are clearly labeled, customers can locate items quickly without having to handle every bag, reducing wear. Organizational methods like these maximize both security and space efficiency.

Hanging Solutions Increase Flexibility and Efficiency

Hooks, hangers, and wall hooks offer a practical way to create vertical storage for purses. Behind-the-door racks or shower-curtain rings can hold lightweight bags or clutches, freeing up floor and shelf space. We advise customers to hang bags only by strong handles to prevent stretching, and to avoid hanging heavy handbags for long periods. Still, hanging solutions remain a valuable part of purse organization because they allow anyone to arrange items in ways that fit their space.

Hanging handbags in our storage units is possible when done thoughtfully. Customers using garment racks or closet systems can hang bags inside dust bags to prevent scratching. Hooks can also be used for accessories associated with purses, such as wallets or small crossbody bags. By combining hanging solutions with shelving, customers create well-balanced systems that are both efficient and protective.

Dust Bags, Cubbies, and Drawers Increase Protection

Dust bags are one of the most effective forms of protection for handbags. They shield materials from dust, fading, and accidental scuffs. We encourage customers to store valuable or delicate purses in dust bags, whether in a bedroom closet or in one of our storage units. When a dust bag isn’t available, a soft cotton pillowcase can serve as a safe alternative.

Cubbies and drawers add another layer of organization. Dividers inside drawers help separate purses, preventing handles or hardware from rubbing together. Cubbies, especially those sized appropriately for handbags, allow customers to sort by size, color, or use frequency. These structured spaces support consistent organizational practices and protect each bag within an orderly, well-labeled system.

Shape Preservation Techniques Maintain Long-Term Quality

One of the most common issues we see with purse storage is loss of shape. Bags collapse when they are empty, and over time, this can lead to permanent creases. To prevent this, we recommend filling handbags with acid-free materials. Tissue paper, clean cloth, or professional bag shapers keep the interior firm without adding weight.

Our customers who store bags long-term benefit greatly from shape preservation. Inside storage units, handbags may sit untouched for months. Filling them prevents sagging and ensures the bag emerges in display condition. By stacking bags only when necessary—and consistently placing the lightest items on top—customers can avoid accidental warping or flattening. This careful approach protects both structure and style.

Color, Material, and Size Sorting Methods Improve Organization

Sorting purses by color, material, or size offers several advantages: visual clarity, quicker access, and better preservation. When customers group leather handbags and fabric bags separately, they reduce the chance of material transfer or accidental staining. Sorting by size also prevents large bags from pressing against smaller, more delicate ones.

Categorizing bags by color is popular among customers who want a visually appealing display. In a bedroom closet, a rainbow-style organization method can make the collection feel curated and stylish. In our storage units, we see customers sort by material first—especially if they have lots of bags—because preservation often matters more than aesthetics in long-term storage. Regardless of method, sorting helps maximize space and maintain order.

Accessories and Related Items Benefit from Coordinated Storage

Purses rarely sit alone; wallets, small accessories, jewelry, and handles often accompany them. When storing these items together, customers reduce the chances of losing pieces that belong with particular bags. Small bins, drawer organizers, or labeled boxes can keep accessories sorted by category.

In our storage units, customers frequently store seasonal accessories, such as hats and jewelry, alongside handbags. By grouping related content carefully and using organizers, they streamline both storage and retrieval. This system also ensures that when someone needs a particular bag, its matching accessories are accessible and accounted for.

Seasonal Rotation Creates Fresh Space and Better Access

Many customers enjoy rotating bags by season. Summer totes, bright-colored handbags, and travel bags can be stored in storage units during winter, while darker, structured handbags return home. This rotation makes room in closets and helps customers stay connected to their favorite pieces without feeling overwhelmed by clutter.

We support seasonal rotation by offering easily accessible units that allow customers to retrieve stored items quickly. Because our facility prioritizes organization and labeling, customers can open a bin, find the exact purse they want, and update their rotation without unnecessary searching. This practice keeps home closets neat and manageable while keeping handbags protected year-round.

Purse Storage Ideas for Home or Storage Units

Safe Packing Methods Optimize Long-Term Storage Conditions

When customers prepare to store handbags long-term—whether during a move, extended travel, or a home renovation—they benefit from thoughtful packing strategies, especially when organizing home renovation for easy access is part of the plan. We guide customers to wrap each bag in soft, breathable materials, use dividers in boxes, and avoid placing heavy items on top of handbags. Handles should be wrapped to prevent indentations, and hardware should be covered to prevent scratching.

Inside our units, stacking should be kept to a minimum, and boxes should be clearly labeled with contents and sizes. This not only optimizes organization but also reduces handling, which can cause wear. By adequately preparing handbags before placing them in long-term storage, customers protect their investment and maintain each purse’s structural integrity.

Climate-Controlled Storage Units Strengthen Preservation

Climate-controlled storage is one of the most important tools we offer for handbag preservation, and the benefits of a climate-controlled storage unit extend far beyond simple temperature regulation. Temperature and humidity can affect leather, suede, coated canvas, and even hardware, making proper environmental control essential. Humid environments may cause mold, while dry air can crack leather and weaken delicate materials. Climate-controlled units stabilize these conditions, providing a reliable environment for long-term handbag storage and ensuring that every purse remains protected from the fluctuations that often damage high-quality accessories.

Our climate-controlled units also help protect materials from fading, warping, or sticking. When customers store extensive collections or high-value handbags, these units offer essential protection. By combining climate control with proper organization, dividers, shelving, and dust bags, customers create ideal conditions that safeguard their handbag collection for years.

Thoughtful Layouts Maximize Usability and Space

Whether organizing a bedroom closet or arranging items inside a storage unit, layout matters. Customers who design their closet with shelves at varying heights, wall hooks, door racks, and baskets can fit more handbags without feeling cluttered. In our storage units, customers often bring modular shelving to create layouts similar to ours.

Using vertical space, stacking carefully, categorizing by use, and labeling boxes all contribute to a logical, efficient system. Customers who build layouts that reflect their personal habits—such as keeping frequently used bags at eye level—benefit from faster access and easier maintenance. A well-planned layout makes purse organization sustainable and straightforward.

Consistent Maintenance Keeps Collections in Top Condition

Maintaining purse storage isn’t a one-time task. Dusting shelves, checking bag condition, adjusting shelf dividers, and updating labels help keep systems neat and functional. We encourage customers to perform a quick inspection every few months to ensure their handbags remain in optimal condition.

For those storing items at our facility, we design units that are easy to navigate, allowing customers to visit, adjust, and reorganize their belongings without stress. Regular maintenance ensures that handbags stay protected, organized, and ready for use anytime.

Support for Every Step of Purse Organization

At McDowell Mountain Community Storage, our mission is to make purse storage easier, safer, and more efficient. We take pride in helping customers organize home closet space, manage seasonal collections, and preserve handbags in our clean, secure, and accessible storage units. By offering stability, protection, and thoughtful guidance, we support customers who want to display, protect, categorize, or optimize their handbag storage systems.

Our facility is designed for anyone looking to maximize space while keeping purses in excellent condition. From racks and shelving to dividers and bins, we help our customers create systems that reflect their personal style and organizational goals. With our storage options and expertise, customers can feel confident that their handbag collection is well preserved, well organized, and always ready for use.

Frequently Asked Questions

1. Can I store vintage or designer handbags in long-term storage without damaging them?

Yes, but they need extra care. Vintage and designer handbags should be stored in climate-controlled environments, kept in breathable dust bags, and supported internally with acid-free materials to maintain structure.

2. How do I prevent metal hardware on my handbags from tarnishing during storage?

Keep hardware wrapped lightly in soft, non-abrasive cloth and avoid exposing it to moisture or plastic. Climate-controlled storage also reduces the risk of oxidation.

3. Are there specific purse organizers recommended for small closets or limited space?

Compact vertical purse organizers, slim shelf dividers, and over-the-door racks are ideal for small closets. These solutions maximize height and depth without taking up floor space.

4. Should I store handbags with their straps tucked inside or left out?

Straps should be stored in a neutral position to prevent creasing. Tuck longer straps inside gently, but avoid bending them sharply. Short handles can remain upright if appropriately supported.

5. What is the safest way to store handbags made of delicate fabrics like satin or silk?

Please place them in individual breathable dust bags and avoid stacking. Cushion them with soft materials and keep them away from coarse surfaces that may snag the fabric.

6. Are storage units safe for handbags that contain natural materials such as leather or straw?

Yes—especially climate-controlled units. Natural materials are sensitive to humidity and temperature changes, so controlled environments prevent cracking, fading, and mold.

7. How often should I rotate or inspect purses kept in long-term storage?

Every 2–3 months is ideal. Regular inspection allows you to air out bags, reshape interiors, and ensure no moisture or pressure marks have formed.

8. Can I store handbags inside their original designer boxes?

You can, but only if the boxes are breathable. Many designer boxes are sturdy but may trap humidity. Add silica packets and monitor moisture if storing this way.

9. What is the best method for storing oversized totes or travel bags that don’t fit standard shelves?

Use wide, open cubbies or large bins with supportive structure. Oversized totes should not be folded; instead, keep them upright with interior support to maintain shape.

10. Should I clean or condition leather handbags before placing them in storage?

Absolutely. Light cleaning and conditioning help leather retain moisture and flexibility during storage. This prevents cracking and keeps the bag in display-ready condition.

Storage Solutions for Artists, Collectors, and Hobbyists

Smart Storage Solutions For Artists, Collectors, And Hobbyists

At McDowell Mountain Community Storage, we provide reliable, flexible storage solutions designed to protect art, materials, artworks, and creative investments of every size. From the individual artist organizing art supplies, paint, and tools in a studio space or office, to hobbyists storing creative materials in a drawer or box, to serious collectors managing extensive collections, we understand that the right way to store art is essential for long-term success. Our storage features are built to support organization, accessibility, and efficient use of space while providing clear information that helps clients make confident storage decisions.

We focus on protecting artworks from damage while supporting practical workflows that adapt to real-world creative needs. By offering storage solutions that maintain stable environments and reduce handling risks, we help preserve artistic integrity and long-term value. Whether managing a single studio space or overseeing an extensive collection, our approach ensures that every artist and collector has a dependable solution that grows alongside their creative journey.

Professional Storage Supports Creative Work And Long-Term Value

Creative work depends on safe storage in the right place and room to maintain long-term quality. Paintings, drawings, prints, sculptures, photographs, and mixed-media artwork all require specific conditions to remain in good condition. We help artists and collectors safeguard each piece of an art collection by offering professional art storage solutions, including secure storage racks and well-planned units designed to protect against moisture, dust, light exposure, temperature fluctuations, and physical damage. Every storage area is structured to support both protection and accessibility.

Art storage is not one-size-fits-all, and effective organization depends on selecting the proper method for each material. Paper, canvases, glass, paints, brushes, pencils, frames, and portfolios all benefit from tailored storage approaches. Our solutions are designed to accommodate a wide variety of sizes, surfaces, and materials while preserving integrity, reducing handling risks, and supporting efficient retrieval across every art storage area.

Organized Storage Preserves Artwork Condition And Accessibility

Proper organization is a critical factor in art preservation, especially for each painting and finished piece within a collection. When artwork and supplies are stored without structure, the risk of scratches, discoloration, bending, or deterioration increases. We encourage the use of shelves, racks, cabinets, drawers, and bins to keep every painting and related items separated, visible, and protected.

Boxes, containers, and compartments help prevent contact between pieces and reduce unnecessary handling. Foam inserts, labeled drawers, and stackable bins allow artists and collectors to access items quickly without disturbing the rest of the collection. This organized approach protects artwork while saving time and reducing stress in the studio or workspace.

Climate Control Protects Against Environmental Damage

Environmental factors play a significant role in preserving art. Temperature, humidity, airflow, and light exposure all affect how materials age over time. We offer storage environments designed to minimize moisture, reduce dust accumulation, and maintain stable temperature conditions.

Fluctuations in temperature and humidity can cause warping, cracking, mold growth, and adhesive failure. By storing art in a controlled environment, collectors and artists reduce the risk of long-term damage and maintain the original condition and value of their masterpieces. Climate-aware storage is essential for paper, canvases, photographs, and painted surfaces.

Flexible Storage Options Support Artists And Hobbyists

Artists and hobbyists often need storage that evolves with their creative process. Our storage options support flexibility, allowing users to store tools, supplies, and finished artwork in one secure location. From paints and brushes to bottles, jars, and specialty products, we provide space that adapts to changing inventory.

Portable, modular, and stackable storage solutions allow artists to scale up or down as needed. Whether storing a small hobby collection or managing a growing body of work, we help create efficient systems that maximize available space without compromising safety or accessibility.

Storage Units Accommodate Artwork Of All Sizes

Artwork comes in many sizes, from small sketches and prints to large paintings and sculptures. Our storage units are designed to accommodate a full range of dimensions, including oversized canvases, framed pieces, and three-dimensional works.

Floor space, wall storage, vertical racks, and shelving systems allow for safe placement without stacking artwork in a way that could cause damage. We recommend separating pieces by size and type to reduce pressure and prevent accidental scratches or breakage. Proper spacing also improves airflow, further protecting delicate materials.

Secure Storage Protects Investment And Artistic Value

Art is both a creative expression and a valuable asset. Collectors and galleries rely on secure storage to protect their investments from theft, environmental damage, and accidental loss. Our storage solutions emphasize safety, controlled access, and secure placement to protect collections of all types.

By using lockable cabinets, designated storage units, and well-organized containers, we help maintain each piece’s integrity. Secure storage also supports accurate inventory management, ensuring that every artwork, tool, and supply is accounted for and easy to retrieve.

Specialized Storage Supports Different Art Types

Different art forms require different storage methods. Paintings benefit from upright storage on racks or shelves that prevent surface contact. Drawings and prints are best stored flat in drawers or portfolios to prevent bending. Sculptures require stable surfaces and adequate space to avoid tipping or pressure points.

Photographs and paper-based artwork need protection from light, humidity, and acidic materials. Using appropriate boxes, archival containers, and labeled compartments helps preserve these items over time. We help artists and collectors match the proper storage solution to each type of artwork.

Studio Storage Improves Workflow And Creativity

A well-organized studio or workspace enhances creativity and productivity. When tools, materials, and supplies are readily accessible, artists spend less time searching and more time creating. Our storage solutions support efficient studio organization by providing designated areas for paints, brushes, tools, and works in progress.

Drawers, cabinets, shelves, and wall-mounted storage keep surfaces clear and protect items from accidental spills or damage. Clear labeling and logical organization methods improve workflow and help maintain a clean, functional studio environment.

Storage Solutions Reduce Wear And Handling Damage

Frequent handling is a common cause of damage to artwork. Improper storage increases the need to move items repeatedly, raising the risk of scratches, tears, and surface wear. Organized storage reduces unnecessary handling by making retrieval straightforward and efficient.

By storing artwork in accessible, well-labeled locations, artists and collectors minimize contact and protect delicate surfaces. This approach is essential for valuable or fragile pieces that require careful preservation.

Long-Term Preservation Requires Strategic Storage Planning

Preservation is a long-term commitment. Storage decisions made today directly affect how artwork looks years or decades from now. We encourage artists and collectors to consider future needs when selecting storage solutions, including potential collection growth and changing storage requirements.

Strategic planning includes choosing appropriate unit sizes, incorporating modular storage systems, and maintaining consistent environmental conditions. This proactive approach helps prevent deterioration and ensures that collections remain protected as they evolve.

Storage Accessibility Supports Efficient Collection Management

Easy access to stored items is essential for effective collection management. Whether preparing for an exhibition, rotating displays, or reviewing inventory, accessible storage saves time and reduces risk. Our solutions prioritize clear pathways, logical layouts, and efficient organization.

Bins, shelves, and racks arranged by category, size, or medium allow for quick identification and retrieval. This system supports both individual artists and larger collectors who manage extensive collections.

Proper Storage Enhances Display And Exhibition Preparation

Storage plays a key role in preparing artwork for display. Well-preserved pieces maintain their visual impact and structural integrity when moved from storage to galleries or display spaces. By protecting artwork from environmental stress and physical damage, storage supports successful exhibitions.

We help ensure that artwork remains exhibition-ready by providing clean, stable environments and organized storage methods that prevent deterioration during downtime.

Storage Solutions Adapt To Changing Creative Needs

Creative needs change over time. New tools, materials, and projects require additional space and different storage configurations. At McDowell Mountain Community Storage, our storage options are designed to adapt, offering flexibility for artists, hobbyists, and collectors at every stage.

Modular units, adjustable shelving, and stackable containers allow for easy reconfiguration. This adaptability supports experimentation and growth without requiring constant replacement of storage systems.

Organized Inventory Supports Accountability And Planning

Accurate inventory management is essential for collectors and professional artists. Organized storage simplifies tracking artwork, supplies, and tools. Labeling systems, designated compartments, and clear organization methods improve accountability and reduce the risk of loss.

Maintaining an up-to-date inventory also supports insurance documentation, sales preparation, and collection planning. We encourage storage systems that make inventory management straightforward and reliable.

Environmental Awareness Protects Artistic Integrity

Understanding the environment in which artwork is stored is essential for preservation. Factors such as airflow, light exposure, and temperature stability influence how materials age. By offering climate-controlled storage units, we ensure artworks are protected from environmental fluctuations, supporting their longevity and maintaining their integrity over time.

Reducing exposure to direct light prevents fading and discoloration. Proper airflow minimizes moisture buildup and mold risk. Stable temperatures prevent expansion and contraction that can damage surfaces and structural components.

Storage Methods Support Both Short-Term And Long-Term Needs

Some artwork requires temporary storage between projects or exhibitions, while other pieces need long-term preservation. Whether you need short-term vs. long-term storage, our solutions accommodate both scenarios by offering flexible access and consistent protection.

Short-term storage benefits from easy retrieval and adaptable organization, while long-term storage prioritizes environmental stability and minimal handling. We help clients choose the proper method for each situation.

Practical Tips to Improve Art Storage Effectiveness

Practical art storage benefits from thoughtful planning and attention to detail. Using appropriate boxes, avoiding overcrowding, and maintaining clean storage areas all contribute to better preservation. We recommend regular checks to ensure conditions remain stable and items remain properly organized.

Simple practices such as rotating stored items, updating labels, and monitoring environmental factors can significantly extend the lifespan of artwork and materials.

Reliable Storage Supports Creative Communities

At McDowell Mountain Community Storage, we serve artists, collectors, hobbyists, and creative professionals who value protection, organization, and accessibility. Our storage solutions support creative communities by providing safe, adaptable spaces for artwork, supplies, and tools.

Proper storage is an essential part of the creative process. By protecting materials, preserving artwork, and supporting efficient workflows, we help artists and collectors focus on what matters most—creating, collecting, and sharing meaningful work with the world.

Frequently Asked Questions (FAQs)

How Do I Choose The Right Storage Unit Size For My Art Collection?

Selecting the right unit size depends on the number, size, and type of artworks you plan to store, as well as future growth. We recommend allowing extra space to ensure safe spacing, airflow, and easy access, preventing overcrowding.

Can Art Storage Be Used For Business Inventory Or Online Art Sales?

Yes, art storage can support business inventory for artists selling online or through galleries. Organized storage allows for secure inventory management, easy retrieval, and efficient order fulfillment.

What Packing Materials Are Best For Transporting Artwork Into Storage?

Acid-free paper, foam padding, protective sleeves, and sturdy boxes are ideal for transporting artwork. Using proper materials helps prevent scratches, pressure damage, and exposure during handling.

How Often Should Stored Artwork Be Inspected Or Rotated?

Stored artwork should be inspected periodically to ensure stable conditions and identify any early signs of damage. Regular checks help maintain preservation standards and provide peace of mind.

Is Art Storage Suitable For Collaborative Studios Or Shared Creative Spaces?

Art storage works well for collaborative environments where multiple artists share resources and space. Designated areas and labeled storage help maintain organization and accountability.

Can Storage Units Accommodate Ongoing Projects And Works In Progress?

Yes, storage units can be used for both completed artwork and works in progress. Flexible layouts allow artists to safely store unfinished pieces without disrupting their workflow.

What Are The Best Practices For Storing Framed Versus Unframed Artwork?

Framed artwork should be stored upright with spacing to prevent pressure on the glass and frames. Unframed pieces are best stored flat in drawers or portfolios with protective layers.

How Does Long-Term Storage Affect Insurance Coverage For Art Collections?

Insurance requirements vary, but proper storage can support coverage by reducing risk and documenting preservation efforts. Keeping organized inventory records is also beneficial for claims and valuations.

Are There Storage Solutions That Support Seasonal Or Rotating Exhibitions?

Yes, accessible storage makes it easy to rotate artwork for seasonal displays or exhibitions. Organized systems allow for smooth transitions between storage and display.

What Common Storage Mistakes Should Artists And Collectors Avoid?

Common mistakes include overcrowding, improper packing, and ignoring environmental conditions. Avoiding these issues helps prevent unnecessary damage and long-term deterioration.

Best Toy Storage Ideas to Keep Kids’ Rooms Neat and Organized

At McDowell Mountain Community Storage, we understand how challenging it can be to keep children’s rooms tidy when toys, books, and games are constantly vying for space. Parents often face a lot of small items—blocks, dolls, art supplies, and accessories—that seem to multiply overnight. That’s why it’s essential to arrange and sort toys and belongings with innovative, space-saving strategies that fit your home’s design and daily routine. From simple DIY labeling projects to adjustable doors on built-in cabinets, every thoughtful touch helps streamline play areas and make cleanup easier for both kids and parents. These creative toy storage ideas turn tidying up into an engaging, hands-on part of the day rather than a chore.

With a combination of clever storage products, functional furniture, and personalized touches, you can transform even the most active playroom into a calm, organized space. Add labeled bins beneath the coffee table, tuck seasonal bedding or plush toys behind cabinet doors, and include low shelves for easy access. A few practical tips—like designating a “cleanup corner” or using stackable containers—go a long way toward maintaining order. The goal is to create a balanced space where every item has a designated home, the room’s content feels inviting, and both children and adults can enjoy a clutter-free environment that works beautifully for everyday life.

Make Use of Vertical Shelves and Wall Storage

One of the best ways to maximize space in rooms filled with kids and toys is to utilize vertical storage. Rather than letting items spill across the floor, install shelves or wall-mounted units to elevate bins, drawer systems, and shelving frames. This creates clear floor space, keeps books and toys accessible, and reduces clutter in bedrooms or playrooms. For example, using a shelving unit with bins or cubbies and stacking storage up the wall ensures you efficiently use the vertical plane while keeping the room neat.

Tips for vertical storage:

  • Choose shelving that fits within your child’s reach — low enough for independent cleanup, high enough to leave open floor space.
  • Add hooks on the walls for accessories, such as dress-up items or stuffed animals.
  • Use labels on shelves and bins so kids know exactly where everything belongs.
  • Consider replacing a plain wall with a bookcase that holds toys, art supplies, books, and game boxes all in one efficient unit.

Use Bins, Baskets, and Storage Boxes to Categorize Items

Bins, baskets, and boxes are indispensable when it comes to organizing toys, clothes, craft supplies, and other “things” that tend to clutter a child’s room. By grouping items (blocks, dolls, cars, board games, books) into clearly labeled containers, you provide structure and encourage kids to put things away. According to organizing experts, this is a crucial aspect of maintaining order in a playroom or children’s bedroom.

Practical container tips:

  • Use transparent bins or ones with picture labels so a child can see what’s inside.
  • Assign one bin per toy type, e.g., “LEGO & blocks,” “Dolls & stuffed animals,” “Cars & trucks.”
  • Place frequently used items in containers at ground level for easy access.
  • Store less frequently used items in containers on higher shelves or in storage racks.
  • Use storage boxes under beds or benches to reclaim floor area.

Incorporate Multifunctional Furniture with Storage

When your house has limited space, furniture that serves dual purposes becomes invaluable. Consider beds with built-in drawers, benches that open up to store toys, or ottomans that serve as both seating and hidden storage bins. According to experts, these multifunctional pieces are among the best toy storage ideas for small spaces.

Furniture ideas to consider:

  • A bed frame with drawers underneath for clothes, books, or toy rotation bins.
  • A bench with storage inside the seat — perfect for stashing bulky toys when not in use.
  • Ottomans or cube seats with removable tops to hide away items like games or art supplies.
  • Storage-equipped bedside units in a child’s room to hold a mix of bedtime toys, books, and craft items.

Create Zones Within the Room for Different Activities

A key organization strategy is to divide the space into zones: a reading nook, a block-building area, a dress-up corner, a game console spot, and a toy car track space. Each zone has its own storage containers, shelves, or racks for the relevant items (books, blocks, dolls, cars, art supplies, games). This zoning approach helps children understand where things belong and supports quick tidying up.

How to implement zones:

  • Identify high-activity areas, such as the play area on the floor, the reading bed zone, and the craft table near shelving.
  • Use rugs or curtains to visually demarcate each zone.
  • Install cubbies or drawers next to each zone for the items used there. For example, blocks and Lego are placed near the floor play area, and art supplies are located on a small shelving unit at child height.
  • Label bins in each zone so children know which “things go where.

Make Labels and Simple Sorting Systems Part of Your Routine

Labels and simple sorting systems are powerful tools for children’s rooms full of toys, books, and craft supplies. When kids can clearly see where items belong, they’re more likely to help keep the room tidy. To take this a step further, organize and label stored boxes properly to maximize efficiency — this ensures that every item has a clear home, makes cleanup faster, and supports the idea of accessible, kid-friendly toy organization and storage solutions.

Labeling tips:

  • Use picture-and-word labels for younger children (e.g., a picture of cars and “Cars”).
  • Use color-coded containers for toy categories (“blue bin = blocks,” “green bin = art supplies”).
  • Use one container per category, and rotate categories seasonally to keep items in use.
  • Get kids involved: let them design the labels or choose the container colors — it builds ownership and fun.

Use Under-Bed Space and Closet Shelving to Free Up Floor Area

Often, the simplest storage spaces are underutilized, such as under the bed or inside closets. By installing shallow containers under the bed, adding shelves inside the closet, or utilizing cubbies along the closet floor, you can remove boxes and bins from the main floor, keeping the room feeling light and spacious. These strategies help maximize space and keep everything in place.

Under-bed and closet ideas:

  • Slide low-rolling bins under the bed for toys, games, or out-of-season items.
  • Add fixed shelves inside the closet space to store stacking bins of items such as clothes, books, and toys.
  • Use the floor of the closet for baskets of stuffed animals or large blocks — keeping the main room open.
  • Ensure storage in the bed or closet is easily accessible for kids, so it becomes part of their tidy-up routine, not hidden away.

Let Playable Items Double as Room Décor

One of the cleverest ways to keep things tidy is to allow children’s toys, books, and craft items to serve as décor, which means they’re then naturally in the right place rather than strewn about. For example, open shelving units can display colorful toys or blocks, and walls can feature pegged boards or racks for small cars, dolls, or accessories. A helpful tip is to use creative labeling or even a custom logo or name tag on display bins or boxes, adding a personal touch that encourages ownership and pride in maintaining a neat space. This approach works beautifully for baby rooms as well, where soft toys, books, and plush animals can double as adorable design accents in safe, rounded corners of the room. It makes tidying less of a “cleanup after play chore and more of a “place things where they belong habit.

Decor-meets-storage ideas:

  • Use open shelving to display your favorite toys and books, just like artwork, complete with labeled or personalized bins.
  • Install pegboards on walls near the play area for hanging dress-up accessories, stuffed animals, or craft supplies.
  • Choose storage furniture that matches or complements the bedroom’s style and color palette — so storage feels like part of the room’s design rather than an afterthought.
  • Rotate toys and games on display to keep the space fresh, visually balanced, and enjoyable for children.

Prioritize Accessible Storage for Children’s Independent Use

Creative and practical toy storage ideas for kids rooms organized by McDowell Mountain Community Storage in Scottsdale Arizona
These creative toy storage ideas show how McDowell Mountain Community Storage in Scottsdale Arizona can help families keep kids rooms organized and clutter free

For lasting success in keeping kids’ rooms clutter-free, storage must be accessible to the child. If toy bins, shelves, or drawers are too high, too dark, or too difficult to access, kids won’t use them — and the items end up on the floor. Research on space-saving design for children’s rooms emphasizes the placement and usability that is most suitable for kids themselves.

Accessibility considerations:

  • Store everyday toys at children’s eye level so they can choose, play, and clean up independently.
  • Use bins with handles or drawers that are simple to open and close.
  • Place heavy or large-sized toys (e.g., big trucks, stuffed animals) on lower shelves or in floor baskets rather than high up.
  • Keep seasonal or less-used items in higher areas or in the communal storage unit (such as your storage facility) and rotate them in and out as needed.

Rotate Toys and Declutter Regularly to Keep Things Manageable

No matter how good your storage system is, clutter accumulates if toys, books, and games keep piling up. A smart way to start decluttering your home fast is to rotate toys: keep some in storage, bring others out in cycles, and rotate them back. This simple method reduces the number of items in a room, keeps kids engaged with what’s available, and helps the space stay tidy and fresh. Expert advice on playroom storage emphasizes this as an effective way to prevent the “everything everywhere” mess.

Rotation and declutter strategy:

  • Set a monthly or quarterly “toy audit day where you and your child review and organize the items. Donate or store away items that are no longer used.
  • Use clear storage bins for off-season or out-of-rotation items and store them in your home’s extra space or at your community storage unit if needed.
  • Keep the in-room collection manageable: fewer items out means less clutter and more value from what’s available.
  • Encourage children to choose which items they want to be accessible, teaching them the importance of decision-making and responsibility.

Implement a Cleanup Routine to Make Use of the System

Even the best storage system won’t succeed unless you build a habit around it. Establish a cleanup routine in the child’s room or play area. Make putting away toys a regular part of your daily routine (e.g., before dinner or bedtime). With clearly labeled bins, accessible drawers and shelves, and defined zones, this becomes a manageable task rather than a significant overhaul. When the system is built with your child in mind (accessible, fun, labeled), the routine becomes part of the play-and-store cycle.

Cleanup routine tips:

  • Set a timer for 5 minutes for a “tidy-up game — kids race to place their toys into bins, drawers, or onto shelves.
  • Use labels and pictures to help your child know where to return each item.
  • At the end of the day, walk through the zones together: “Are all books back on the bookshelf? Are the blocks in their bin? Are the cars in the container?”
  • Praise children for helping — this reinforces the habit and makes the storage system part of the fun.

When Space Is Limited: Off-House Storage and Seasonal Overflow

If your house, playroom, or children’s bedrooms are tight on space, remember there is a solution off-site: storing seasonal toys, extensive game collections, or bulky items in external storage allows you to keep only the most used items in the room. At McDowell Mountain Community Storage, we offer secure, clean, accessible units where you can store overflow items. This way, you free up your house space for the toys and items that matter most now — and bring others in when needed.

Off-site storage advantages:

  • Free up precious floor and closet space in your home by moving extra boxes, large outdoor toys, or seldom-used items.
  • Rotate items back into your child’s room when needed (perhaps after a birthday or new gift) — a kind of “toy library you control.
  • Use shelving or stackable boxes in your storage unit to make it easy for items to be added and removed when you make changes.
  • Keep the most frequently used items in the bedroom/playroom and store the rest — this supports toy rotation and keeps clutter to a minimum.

Final Thoughts: Tailored Design and Long-Term Efficiency

By combining vertical shelving, baskets and bins, multifunctional furniture, clearly defined zones, labeling, child-accessible storage, rotation, and off-site overflow options, you can create a toy-friendly environment that remains neat, accessible, and fun. Whether it’s the playroom, bedroom, or even the living room where children bring toys, applying these storage principles helps turn “everything everywhere into “everything in its place.”

For families at McDowell Mountain Community Storage, remember: storage isn’t just about putting items away—it’s about creating an organized, attractive, efficient space for children to play, learn, read, build, and imagine, while keeping your house and bedrooms clutter-free.

Reach out to our team if you’d like help planning the overflow storage component or selecting the right unit size to complement your home’s toy organization strategy. With the right design in place, you’ll be in control of storage and cleanup routines in no time.

Frequently Asked Questions (FAQs)

1. What are the best toy storage ideas for small apartments or condos?

For smaller spaces, focus on vertical organization and furniture that serves multiple purposes. Wall-mounted shelves, stackable bins, over-door organizers, and under-bed drawers enable you to store a large number of items efficiently. Opt for compact, modular furniture to keep every inch of space functional and clutter-free.

2. How can I make toy storage blend with my home décor?

To maintain a cohesive look, choose materials and colors that match your existing décor. Woven baskets, fabric bins, or wood-toned boxes can complement the style of your living room or bedroom. Decorative shelving, labeled trunks, or color-coordinated bins not only add visual appeal but also enhance organization and clarity.

3. What toy storage options work best for babies and toddlers?

For young children, use soft fabric bins, low open shelves, and labeled baskets to organize their belongings. Rounded corners and lightweight containers keep everything safe and accessible. These storage ideas not only protect babies from bumps and scratches but also make it easy for them to learn early tidy-up habits.

4. How can I involve my kids in keeping their rooms organized?

Make cleanup time fun by turning it into a game or challenge. Use colorful labels or add your child’s name to bins and cubbies for a personalized touch. Encourage them to sort items — like blocks, dolls, cars, and books — into separate containers. Positive reinforcement helps kids develop a sense of ownership and consistency in keeping their spaces tidy.

5. What are some affordable DIY toy storage ideas?

Creative DIY options include repurposing everyday household items such as crates, shoeboxes, or baskets. Decorate them with paint, washi tape, or stickers to match your child’s room. Hanging fabric pockets or wall racks are also simple and effective for storing art supplies, small toys, or craft materials neatly.

6. How often should I declutter or rotate toys?

A good rule of thumb is to declutter every few months. Sort toys into “keep,” “donate, and “store piles. Rotating toys helps keep playtime exciting and reduces the feeling of clutter. Fewer toys out at once also makes cleanup easier and helps children appreciate their collection more.

7. What’s the best way to organize small toys like LEGO, cars, or craft supplies?

Use clear containers or drawer organizers with dividers for small toys and accessories. Label each section clearly — “LEGO,” “art supplies,” “cars, etc. For extra efficiency, place these behind cabinet doors or inside low drawers where kids can easily reach them without making a mess.

8. How can I manage toy storage in shared spaces like the living room?

Opt for multi-use furniture — such as a coffee table with hidden compartments, ottomans with lift-up lids, or benches with built-in bins. These discreet storage pieces allow toys to be tucked away quickly, preserving the room’s décor while keeping play items easily accessible when needed.

9. What toy storage solutions help with quick cleanup routines?

Create a system that simplifies tidying up — a “cleanup corner or large catch-all basket is excellent for fast end-of-day organization. Keep labeled containers nearby so kids can quickly return toys to their designated places. A simple tip: use bright colors and visuals to guide children and make cleanup part of their play.

10. How can I handle overflow or seasonal toy collections?

When you have a lot of toys, rotate them seasonally or store off-season items in labeled boxes or stackable bins. Keep current favorites accessible, and store extra toys in closets, under beds, or in garage shelving. This approach minimizes clutter and ensures every product and play item has its proper place.

Organizing Your Home Renovation Storage Unit for Easy Access

Home renovations are a powerful way to breathe new life into your space. Whether you’re revamping a single room or undertaking a full-house remodel, managing your belongings during the process is one of the most critical yet overlooked steps of the project. Between dust, debris, tools, and contractors coming in and out, your possessions—and even your supplies-are at serious risk of damage if not properly stored. That’s why it’s essential to categorize your items, prioritize what you’ll need access to, and streamline the way you pack and store everything. With a bit of planning, you can optimize your storage space and ensure nothing gets lost, damaged, or forgotten—especially if there’s something fragile or high-value involved. 

That’s where a well-organized storage unit comes in. At McDowell Mountain Community Storage, we offer practical, secure, and flexible self-storage options tailored to meet your specific storage needs—especially during home renovations. We understand that you’re storing a lot of valuable belongings, and it’s essential to keep them safe from risks like dust, mold, and disorganization. In this guide, we’ll walk you through how to organize your unit in a way that offers easy access, protects your items, and reduces stress throughout your renovation journey—while keeping a clear record of where everything is and ensuring you have the correct information to make storage simple and effective.

Start With a Strategy: Plan Before You Pack

Before putting a single item into a box, create a detailed plan. Start with an inventory list of all items you intend to store. Divide the list by rooms or categories—such as furniture, appliances, electronics, tools, artwork, decorations, or supplies—to keep things organized.

This system helps you sort everything efficiently and reduces the risk of losing or damaging possessions during the renovation process. Be sure to take note of condition, size, and weight. Use this opportunity to declutter and get rid of anything you no longer need. There’s no point in storing clutter you won’t want to bring back after your project is complete.

Use the Right Storage Containers for the Job

When it comes to packing, not all containers are created equal. Invest in high-quality storage containers, bins, and boxes that are specifically designed to suit the contents. For fragile items such as glassware, electronics, and artwork, use bubble wrap, blankets, and covers to protect them from dust, moisture, and accidental damage.

Plastic storage containers with secure lids are great for resisting dirt and protecting against mold—especially in areas prone to moisture. Label each container clearly and consistently. Use waterproof markers or printed labels and note the contents, destination room, and any special handling instructions (like “FRAGILE” or “THIS SIDE UP”). These kinds of thoughtful steps are among the most effective storage unit organization ideas to keep your renovation process smooth and stress-free. 

Maximize Space by Arranging Items Thoughtfully

The key to efficient storage is making the most of your available space. That means you’ll need to maximize both vertical and horizontal real estate within your unit. Use shelves if possible to keep items off the floor and make access easier. Stack lighter boxes on top of heavier ones, and keep the heaviest items on the bottom to prevent crushing.

If you’re storing large pieces, such as beds, tables, or furniture, consider disassembling them to save space. Place flat pieces upright along the walls to create room in the center. Be strategic: store items you won’t need until the end of the renovation in the back and things you may need to access in the front.

Don’t forget to leave walkways so you can reach the back of the unit without having to unpack everything.

Keep Accessibility in Mind

During a home renovation, you might need to access some of your contents—from spare tools to seasonal decorations or even an extra appliance. That’s why accessibility is just as important as protection.

Use a layout that allows you to easily get to what you need. Group related items together and consider using clear plastic bins so you can see what’s inside without having to unstack them. Keep a printed or digital inventory map near the entrance of the unit or on your phone so you always know where things are located.

This level of organization creates peace of mind and streamlines your renovation process.

Protect Your Belongings from the Renovation Environment

Renovations are messy. They kick up dust, produce debris, and can introduce unexpected moisture or dirt into your home. Keeping your possessions in a secure storage facility safeguards them from that chaos.

At McDowell Mountain Community Storage, our self storage units offer top-notch security, modern amenities, and options to fit your exact storage needs. By moving your belongings off-site, you reduce the risk of damage during construction and make room for contractors to work more efficiently. These benefits align perfectly with practical strategies, such as seasonal storage hacks for a clutter-free home, helping you maintain order not just during renovations but throughout the year.

That’s a significant advantage that saves you money, time, and stress in the long run.

Take Advantage of Self Storage Flexibility

A good storage solution offers flexibility—and that’s essential when your renovation timeline changes or when unexpected delays occur. Self-storage gives you control over how long you keep items tucked away, so you don’t have to rush to move them back into your home before the renovation is truly complete.

Whether you’re dealing with short-term clutter or long-term space constraints, a self-storage unit lets you store your items safely for as long as needed.

Declutter as You Go

Renovating is the perfect time to declutter. As you pack up items, ask yourself if each one truly needs to come back into your refreshed home. Use this chance to donate, sell, or recycle things you no longer use.

Decluttering not only reduces the number of boxes in your unit but also helps you feel more organized and in control. A tidy storage unit equals a tidy mind—and a smoother transition when it’s time to move everything back in.

Special Considerations for Fragile or High-Value Items

Some belongings require extra care during storage. High-value artwork, vintage furniture, sensitive electronics, and delicate glassware need protection from temperature changes and moisture. Use proper covers, breathable materials, and climate-controlled storage units when possible.

At McDowell Mountain Community Storage, we can help you select the ideal unit for these sensitive items, providing added peace of mind.

Neatly organized storage unit with labeled containers and furniture during a home renovation in Scottsdale, AZ at McDowell Mountain Community Storage
This image shows a clean and efficiently arranged storage unit at McDowell Mountain Community Storage in Scottsdale, AZ, ideal for protecting belongings during a home renovation

Organize a Small House With No Storage Space

Not all homes have generous storage space. If your renovation involves a small house with limited space, a storage unit can provide the extra room you need. Store beds, wardrobes, appliances, and equipment to free up rooms during the renovation process.

Even after the renovation is complete, many families choose to maintain their self-storage space to reduce clutter and better organize their contents at home. It’s a long-term solution that fits evolving storage needs.

Tips for Cleaning Out Your Storage Unit Post-Renovation

Once the dust has settled and your home is ready, it’s time to clean out the storage unit and bring your items back. Use the inventory list you created to check that all possessions are accounted for and in good condition. Unpack methodically and re-evaluate whether you want to reintroduce everything—or keep some items stored for seasonal or future use.

Consider donating or discarding anything that no longer fits your lifestyle. A clean unit and a clean house go hand in hand.

Benefits of Staying Organized

By organizing your renovation storage unit properly, you’ll enjoy several key benefits: greater efficiency when packing and unpacking, enhanced security for your valuable items, smarter use of available space, and improved accessibility during and after the renovation process. Most importantly, you gain peace of mind knowing your belongings are safe, protected, and easy to find when you need them.

With proper organization, your storage containers will be easy to stack, sort, and arrange, saving you time, reducing stress, and helping you avoid unnecessary frustration throughout your project.

Why Choose McDowell Mountain Community Storage

When it comes to self-storage and trust matters, at McDowell Mountain Community Storage, we provide flexible unit sizes to accommodate any project, along with secure, climate-controlled environments that help protect your belongings from damage. Our facilities are designed for easy access, so you can reach your unit whenever needed. Plus, our friendly team is always available to offer expert advice on packing, organization, and layout. We’re here to help you store, protect, and access your possessions with confidence through every phase of your home renovation journey. 

Whether you’re trying to organize a small house with no storage space, in the middle of a significant construction project, or just looking for innovative storage unit organization ideas, we’ve got the solution. Declutter your renovation with confidence—choose McDowell Mountain Community Storage for security, convenience, and peace of mind.

Contact us today to reserve a unit and get personalized help with all your storage needs.

Frequently Asked Questions

1. Can I access my storage unit during the renovation if I need to retrieve something from it?

Yes! At McDowell Mountain Community Storage, we offer convenient access hours, allowing you to retrieve or add items as your renovation progresses efficiently. We recommend keeping frequently needed items near the front of your unit for easy reach.

2. How do I select the right-sized storage unit for my renovation project?

The right size depends on how much you need to store. If you’re unsure, our team can help you estimate based on the number of rooms being renovated and the types of items (e.g., beds, appliances, artwork, tools) you plan to store.

3. Are climate-controlled units necessary during a renovation?

Climate-controlled units are highly recommended for sensitive belongings such as electronics, artwork, antiques, and essential documents. These units protect against extreme temperatures and moisture buildup, reducing the risk of mold, warping, or corrosion.

4. Can I store renovation materials and tools in the unit as well?

Absolutely. Many customers store tools, extra construction materials, and supplies in their units to keep the renovation site cleaner and more organized. Just make sure to check our guidelines for storing hazardous or flammable materials.

5. What’s the best way to track what I’ve stored?

Creating an inventory list is essential. You can keep a written or digital record with categories like furniture, electronics, or seasonal decorations. Some customers even use apps or spreadsheets with photos and box numbers to streamline access to their information.

6. Do you offer packing or moving supplies on-site?

Yes, McDowell Mountain Community Storage provides a range of packing supplies, including boxes, bubble wrap, blankets, covers, tape, and labels to help keep your belongings protected and organized during the renovation.

7. How can I protect furniture during long-term storage?

Disassemble large furniture if possible, and wrap pieces in breathable covers or moving blankets. Avoid using plastic directly on wood or upholstery, as it can trap moisture and lead to mold. Use pallets or shelves to elevate items off the floor.

8. What if my renovation timeline changes—can I extend my storage rental?

Of course! One of the most significant benefits of self-storage is flexibility. If your project runs longer than expected, you can easily extend your rental period to match your updated renovation schedule.

9. Can I store seasonal decorations and belongings after my renovation?

Many customers continue to use their storage units for seasonal items or overflow belongings after renovations are complete. It’s a great way to keep your home clutter-free throughout the year.

10. Is insurance required for the items I store?

We recommend insuring your stored items for added peace of mind. Some homeowners’ policies may extend coverage to off-site storage, or you can purchase affordable insurance directly through our facility to protect against accidents, theft, or natural events.

Bedroom Storage Ideas with Style and Functionality

Creating a functional, stylish, and organized bedroom doesn’t have to be complicated. With the right bedroom storage ideas, you can transform your space into a peaceful haven that meets your everyday needs. At McDowell Mountain Community Storage, we understand how essential space, storage, and thoughtful design are when managing your home, especially when it comes to making your bedrooms more efficient. From maximizing closet space, improving sight lines, and placing key items within reach to incorporating practical seating and clever storage for all your daily essentials, every thoughtful addition makes a difference in keeping your space feeling open and clutter-free. 

Whether you’re looking to reduce clutter, optimize floor space, or express your unique aesthetic, this guide covers everything — from essential furniture pieces and clever organization solutions to smart storage compartments and functionality tips. We’ll explore the best products, the most effective setups, innovative shelving techniques, popular styles, versatile dressers, and how to utilize different areas in your room. From functional ottomans to creative idea boards and organized spaces for toys, you’ll find practical solutions that suit every lifestyle.

The Modern Bedroom: Blending Style and Practicality

Your bedroom is more than just a place to sleep. It’s a personal retreat — a place to relax, read, and recharge. That’s why the right style, functionality, and storage matter. Whether you’re adding a rolling cart for convenience, updating just one piece of furniture, or looking to enhance the overall appeal of your space, there’s always something you can do to make it better. Well-chosen accents, thoughtful details on each side of the room, and even optimizing your bathroom-adjacent storage contribute to a balanced space. Great bedroom storage solutions not only impress visitors but also make your day-to-day life smoother and more enjoyable.

Start with your bed and expand from there. From shelves above the headboard to under-bed drawers and bins for blankets, every piece can serve a purpose. Choose dual-purpose furniture, such as an ottoman with hidden compartments or a dresser that doubles as a TV stand. Take inspiration from other areas of the home — even your living room — where benches, layered home decor, and multifunctional storage come together effortlessly. Keep frequently used items close at hand, and let both form and function guide your bedroom layout. 

Stylish nightstands, thoughtful accessories, and smart drawers can elevate your bedroom storage ideas while providing easy access to daily essentials, such as socks, towels, or books. Add a lamp for cozy evening lighting, and consider integrating a desk, bedside tables, or a compact cart to keep everything organized. Incorporate built-ins or a freestanding bookcase to display photos, your favorite collection, or even a personal library. Need space for toys or hobby items? Utilize versatile bookcases or labeled storage cabinets to maintain a tidy space. Don’t forget your mattresses—storage-friendly bed bases are a brilliant idea. Whether you choose one signature piece or combine some clever options, every choice should reflect your lifestyle and enhance the overall appeal of your retreat. Consider adding vertical rods for hanging accessories and using color accents to tie the whole space together. With plenty of ways to personalize and something for every taste, stylish bedroom storage is well within reach.

Declutter Your Room with Smart Storage Options

Clutter is the enemy of peace, and a clutter-free bedroom begins with organization. Keep clothing tucked neatly in cabinets or armoires. Use baskets or bins to group small items, such as jewelry, mirror accessories, or makeup.

Don’t overlook the nightstand — a sleek platform for books, lamps, or a glass of water. Select units with drawers or shelves for added storage without occupying extra floor space.

Need more ideas? Here are some stylish and functional solutions:

  • Closet upgrades: install double rods, add hooks or sliding doors
  • Underbed storage: great for seasonal clothes or shoes
  • Stackable carts or storage benches for multi-use needs
  • Wall-mounted shelves for display pieces

At McDowell Mountain Community Storage, we offer affordable units for overflow belongings, off-season wardrobes, or even complete room makeovers.

Maximize Every Inch of Bedroom Space

Living in a small apartment or trying to share a room? You can still achieve a clean and cozy environment with innovative storage solutions.

Modular and Multi-Use Furniture

Modular furniture pieces can adapt to your changing needs. Try sectionals, fold-away beds, or sofas that convert into guest bedding. Add a storage bench at the foot of the bed or a bookcase that doubles as a room divider.

Space-Saving Tricks

  • Use vertical space with tall bookshelves
  • Add corner shelves to unused wall space
  • Choose minimalist designs with hidden compartments
  • Use drawer dividers to sort undergarments, socks, or jewelry

Bedroom Zones: Organize with Purpose

Your bedroom should be a multifunctional space. Creating zones helps define usage and keeps everything organized:

  • Reading nook: Use a plush chair, soft pillows, and a lamp beside a bookshelf
  • Work zone: Add a compact desk, office supplies, and organizers
  • Wardrobe area: Designate a closet space with drawers, racks, and a mirror

The layout of your room matters. A bright arrangement doubles storage without sacrificing comfort. Don’t forget to leave plenty of room for movement and relaxation.

Bedroom Storage Essentials: A Checklist

From your bed to your closet, here’s a quick checklist of essential bedroom storage ideas:

  • Baskets for throws and extra linens
  • Drawer dividers for organization
  • Hooks for jewelry or scarves
  • Shelves for books and decor
  • Wardrobe or armoire for clothing overflow
  • Underbed containers for rarely-used items
  • Built-ins for custom design solutions
  • Storage cabinets for long-term storage
  • Bedside tables for nighttime essentials

Looking for more space? Our off-site storage units offer climate control, secure access, and flexible leasing for items you don’t need every day.

Styling Your Storage: Interior Design with Function

Storage doesn’t mean sacrificing style. Keep your bedroom furniture consistent with your interior decor, and choose pieces that blend into your style — whether that’s modern, minimalist, or boho chic.

Use color and texture to define your style:

  • Earth tones for a calming retreat
  • Glossy white or black for a minimalist look
  • Wood finishes for a rustic, warm vibe

Choose furniture that balances practicality with beauty. A floating shelf, a sleek cabinet, or a vintage dresser can make your space feel intentional and curated.

Seasonal Storage and Furniture Flexibility

Storage is not static — your needs change with seasons, life events, or even new hobbies. Keep your bedroom storage adaptable with:

  • Rotating blankets, linens, and clothing
  • Storing out-of-season items off-site
  • Replacing furniture to match your current lifestyle

A dedicated storage account with McDowell Mountain Community Storage gives you the flexibility to store what you need when you need it. From boxes and cabinets to seasonal bedding, we help make more room in your home without losing touch with your personal space.

Advanced Storage Techniques for Ultimate Efficiency

If you’re ready to go all-in, here are some pro-level tricks to bring your storage game to the next level:

1. Go Vertical

Utilize wall space from floor to ceiling. Think floating shelves, hanging hooks, and overhead cabinets. Even your door can become a place to hang robes, bags, or organizers.

2. Maximize Compartments

Compartmentalize drawers with trays or inserts. Label bins and boxes for quick access. Break down large spaces into smaller compartments to eliminate clutter.

3. Use Doubles

Choose items that perform double-duty: an ottoman that stores bedding, a bench with cubbies, or a desk that becomes a vanity. These solutions maximize practicality and save valuable floor space.

Personalized Storage for Every Lifestyle

Bedroom with efficient storage furniture and layout created by McDowell Mountain Community Storage in Scottsdale Arizona
Maximize your bedroom space with multifunctional furniture and storage designs from McDowell Mountain Community Storage in Scottsdale Arizona

Your home should work for your life, not the other way around. Whether you live in a city apartment or a family house, everyone can benefit from better bedroom storage ideas.

Need a space for books, photos, or your growing collection? Want a quiet library area? Looking for privacy choices in a shared room? There’s a solution for that.

Here are a few lifestyle-based tips:

  • Students: Use cube storage, rolling carts, and compact desks
  • Families: Invest in toy-friendly bookcases, deep drawers, and organizers
  • Professionals: Add stylish armoires, label office supplies, and use furniture pieces that offer built-in storage cabinets

Why Storage Units Help Simplify Life

Sometimes, your home can’t hold it all. That’s where McDowell Mountain Community Storage comes in. We offer short-term and long-term storage units tailored to meet every need. Whether you’re rotating decor, storing mattresses, or keeping your home office tidy, our units are:

What size unit do you need? Check out our Storage Unit Size Guide, or talk to our team for a personalized recommendation.

The Bottom Line

A well-organized bedroom promotes better sleep, reduced stress, and increased joy. By utilizing bright bedroom storage ideas, incorporating stylish furniture, and implementing a few creative solutions, you can transform your room into a space that is both comfortable, efficient, and beautiful.

If your needs exceed your available space, McDowell Mountain Community Storage is here to help with affordable, flexible storage units near you.

Remember, it’s not about having less — it’s about having what you need, where you need it, and loving the way it looks.

Frequently Asked Questions

1. What are the best bedroom storage ideas for renters who can’t make permanent changes?

Many renters require non-permanent storage solutions, such as over-the-door organizers, freestanding shelves, rolling carts, and under-bed containers, that don’t damage walls or require drilling.

2. How can I add storage to a small bedroom without making it feel cramped?

Look for slim-profile furniture, wall-mounted shelves, and vertical storage. Multifunctional pieces, such as beds with drawers or floating nightstands, can save floor space.

3. Are there eco-friendly bedroom storage solutions available?

Yes, consider bamboo shelving, reclaimed wood dressers, or fabric bins made from recycled materials for a sustainable approach to storage.

4. How can I keep my bedroom storage looking stylish and uncluttered?

Stick to a cohesive color palette, use baskets or containers with similar finishes, and avoid overstuffing open shelves. Hide small items inside decorative boxes or behind closed doors.

5. What’s the best way to store seasonal clothes in a bedroom?

Use vacuum-sealed bags, bins under the bed, or top-shelf boxes in the closet. Label everything and rotate items in and out based on the season.

6. Can I use furniture from other rooms (like the living room or kitchen) for bedroom storage?

Absolutely. Bar carts, sideboards, or even dining benches can be repurposed for bedrooms—ensure they match your aesthetic and fit the space comfortably.

7. What type of storage works best for shared bedrooms?

Opt for individual storage bins, labeled drawers, or color-coded organizers to distinguish between roommates’ belongings. Loft beds or room dividers with shelves also help define personal space.

8. How do I organize accessories, such as scarves, jewelry, and belts?

Use drawer dividers, hanging organizers, hooks behind doors, or dedicated trays on dressers or nightstands to organize your belongings. Vertical jewelry stands are also both functional and decorative.

9. Are there smart tech solutions for organizing the bedroom?

Yes! Consider app-connected closet systems, under-bed lighting with motion sensors, or smart bins that help track inventory for fashion lovers or collectors.

10. How often should I declutter and reorganize my bedroom storage?

A good rule of thumb is to review and refresh your storage every season, approximately three to four times per year. It helps accommodate lifestyle changes and keeps the space feeling fresh and manageable.

Garden Tool Storage Ideas

Organizing your garden tools can sometimes feel overwhelming, especially if you have various equipment and accessories scattered across your backyard, shed, or garage. However, a well-organized tool storage system can save you time, effort, and money by ensuring your garden tools are easily accessible and in good condition. Whether you’re working with a limited space or have an entire shed, there are plenty of garden tool storage ideas to consider. You can use a rack, hangers, and arrangement options to keep things in order or even create custom storage with holes for organizing tools and small items inside containers. Here are some of the most effective ways to organize your tools and tidy your outdoor space. 

Wall Organization for Garden Tools

One of the best ways to store garden tools is by utilizing wall-mounted storage. This is particularly useful if you have limited floor space and want to make the most of your walls. Using the wall for storage keeps tools off the ground, which helps prevent rust, damage, and clutter. Installing hooks, racks, or pegboards on your walls is a great way to store garden tools like rakes, shovels, hoes, and watering cans. For more ideas, you can search Pinterest for creative solutions. Consider placing your tools on a shelf near the door or front of the house for easy access. You can add custom handles to your racks for a unique touch and better functionality. This setup keeps your tools organized and provides valuable information about your space’s most efficient storage solutions. 

Pegboard for Versatile Storage

A pegboard is an incredibly versatile storage solution that allows you to customize your organization system. It’s perfect for storing gardening tools that vary in size and shape. You can hang your tools on hooks or store smaller items in bins attached to the board. Different shelves or baskets can separate smaller accessories like gloves, garden markers, and seed packets for a more organized system. There’s an idea to explore when using a pegboard for tool storage. For more inspiration, check Instagram to see how others organize their stuff. You can attach your pegboard to studs in the wall for added stability and consider various storage options like adjustable hooks and bins to make your setup work. Pegboards are affordable, easy to install, and can be adjusted to fit different tool sizes, making them a perfect choice for any garden place. 

Using Hooks for Garden Tools

If you don’t have the space for a large pegboard, installing a few hooks on the walls is an easy and affordable solution. By placing hooks at different heights on the wall, you can store various tools in an organized way. For instance, you can hang long-handled tools like rakes, shovels, and hoes on the top of the wall, leaving smaller tools and accessories like pruners and gloves closer to the floor. You can even use wall-mounted hooks for hanging bags, garden aprons, or hoses, keeping all your tools in one convenient spot. This setup can save you a lot of space and make your tools more accessible. With some creativity, you can incorporate hooks on the side of your shed, garage, or kitchen wall for easy access. You can also check out various products on the site to see how they could enhance your storage solutions. Update your garden tool storage content regularly for fresh life and organization tips! 

Shed and Garage Storage Solutions

For those with a shed or garage, there are plenty of ways to maximize your storage space. One of the most effective ways to store tools in these areas is to use the available vertical space. Shelves, racks, and wall-mounted systems allow you to store items without wasting valuable floor space. You can hang long-handled tools like a rake on the wall or store them on shelves for easy access. It’s essential to plan your layout carefully, considering how you use each tool and where it’s most efficient to store them. Including pictures of different storage setups can provide helpful inspiration and show details on organizing your tools. Keep a menu of your tool storage ideas or a design icon to track your progress and ensure you’re meeting your storage needs, making it a simple task for you to stay on top of tool duty. 

Installing Shelves for Larger Items

If you have more extensive garden tools like lawnmowers or weed eaters, installing shelves is a great way to keep them organized. You can place the more significant tools on the bottom shelves and store smaller items like pots, soil bags, and seed trays on the top shelves. Shelves are ideal for organizing gardening tools that are frequently used, ensuring that everything has its dedicated spot. Additionally, shelves can store bins of smaller items, keeping everything within easy reach. You can even add a piece of pegboard or hooks for extra storage. For those wondering how to secure shelves, screws are key to keeping everything in place, so make sure to use the right size and type for your wall material. Thanks to innovative shelf systems, organizing your tools has never been easier. It’s a simple solution that saves space and keeps things tidy. If you have any questions or need help with installation, post in the comments below – the guys at the hardware store can give you tips on what to use to secure your shelves. You can even drill a hole to hang a hook if needed. 

Use of Pegboard in Sheds and Garages

Pegboards aren’t just for indoor use; they can also be incredibly effective in sheds and garages. The garage is one of the best places to implement pegboard storage. It keeps your tools off the floor, making the entire space more organized. You can hang garden tools, accessories, and your toolbox on the pegboard. By using a combination of pegboard and wall-mounted hooks, you can store a wide variety of gardening items in a neat and accessible way.

DIY Garden Tool Storage Ideas

Sometimes, the best storage solutions are the ones you make yourself. DIY garden tool storage projects can help you create a storage system that fits your unique needs and space constraints. With some creativity and effort, you can design and build your own storage solutions tailored to your gardening habits.

Wall-Mounted Storage Projects

If you’re good with tools, you can create a custom wall-mounted storage system for your garden tools. A simple project involves building a wooden board with attached hooks to store long-handled tools. You can build a pegboard system with adjustable hooks and shelves for a more advanced project. Consider using materials like wood or metal for durability, and ensure that the system is sturdy enough to hold heavier items like rakes and shovels. These DIY projects can be tailored to your specific storage needs, allowing you to build the best system for your tools.

Storage Boxes and Bins for Smaller Tools

Custom storage boxes or bins can be great for smaller garden tools like pruners, hand trowels, and gloves. These can be stored on shelves, stacked in the corner of your shed, or even used as portable storage containers. You can also build a simple toolbox with separate compartments for each tool to ensure that everything stays organized and easy to find. A toolbox can also keep your most frequently used tools in one place, reducing the time it takes to gather everything for your gardening projects.

Tool Storage in Cabinets and Containers

Another great way to organize your garden tools is by using cabinets or containers. Cabinets provide a clean and enclosed storage space that keeps your tools out of sight, which is especially useful if you want to keep your garage or shed looking neat and tidy. Containers are great for storing smaller items, such as seeds, fertilizers, and gardening gloves. Storage bins with lids can also help keep dirt and dust from getting into your tools when unused. Additionally, you can label each container to make finding things more manageable.

Space-Saving Tips for Small Gardens

If you have a small garden, you must be incredibly creative with your storage. Here are some space-saving ideas to help you store your tools without taking up too much space:

Utilize Ceiling Storage

If your shed or garage has high ceilings, you can use ceiling-mounted racks or hooks to store tools like rakes and shovels. This is a handy option for smaller spaces, as it frees up floor space while allowing you to store your tools conveniently. Ceiling-mounted storage is also a good solution for seasonal tools that are used less frequently, such as snow shovels or leaf blowers.

Corner Shelves and Racks

Maximizing corner space is another effective way to save room. Install corner shelves or use corner racks to store tools and accessories. Corner racks are ideal for organizing gardening tools like watering cans, spades, and pots. You can also use corner shelves to store small containers, tools, and baskets. These systems help use every available inch in your garden shed or garage.

Compact Storage Units

Compact storage units are an excellent solution for those with limited space. You can use compact shelving units, tool boxes, or wall-mounted organizers to store your garden tools without wasting too much space. These space-saving systems keep your tools organized and accessible while maximizing your space.

Storing Garden Tools in Climate-Controlled Units

Creative garden tool storage ideas that help organize tools efficiently with McDowell Mountain Community Storage in Scottsdale Arizona
Learn how to organize your garden tools with innovative storage solutions from McDowell Mountain Community Storage in Scottsdale Arizona

Consider a climate-controlled storage unit if you’re storing your tools for an extended period, such as during the off-season. These units provide consistent temperature and humidity levels to help preserve the condition of your garden tools. For example, a climate-controlled storage unit will protect wooden or metal tools from damage caused by extreme heat or cold. Additionally, a climate-controlled unit helps prevent rust and decay in tools that may otherwise be exposed to moisture or humidity in your shed or garage. At McDowell Mountain Community Storage, we offer climate-controlled storage options that ensure your garden tools stay in excellent condition all year. Whether you’re storing tools, outdoor furniture, or other equipment, our units provide a safe, secure, and convenient solution for all your storage needs.

Choosing the Right Storage Unit

When selecting a storage unit for your garden tools, consider the size. A storage unit size guide can help determine which storage unit best fits your needs. Whether you’re storing a few yard tools or a complete set of equipment, a storage unit can keep your tools safe, organized, and protected from the elements.

Conclusion

Keeping your garden tools organized doesn’t have to be complicated. Whether you install wall-mounted hooks, build a custom pegboard, or utilize storage cabinets and bins, plenty of options help you maintain an organized space. By following these storage ideas and incorporating space-saving solutions, you’ll ensure that your tools remain in good condition and are always within easy reach. Whether you have a small garden shed or a large garage, these tips will help you create an efficient, clutter-free storage system that works for your needs. Your gardening experience will be more enjoyable, productive, and organized with the right tools and storage ideas.

Frequently Asked Questions

What are the benefits of using pegboards for garden tool storage?

Pegboards help organize tools by offering a customizable and space-efficient solution. They keep tools off the floor, reducing clutter and preventing damage like rust. Pegboards maximize vertical space, making them perfect for small sheds or garages, and allow easy adjustment of hooks for better tool organization.

How do I choose the right hooks for my garden tool storage system?

Select hooks based on the size and weight of your tools. Use heavy-duty hooks for large items like shovels and rakes and smaller hooks for light tools such as gloves or pruners. Adjustable hooks offer flexibility, allowing you to rearrange the setup as your collection changes.

Can I create a custom storage system for my gardening tools?

Creating a custom storage system allows you to tailor your setup to fit your space and needs. Use wood, metal, or other materials to build racks, shelves, or pegboards. Customize your storage to organize tools by size, frequency of use, and easy access for efficiency.

What are some space-saving storage options for small garden sheds?

Use vertical storage solutions like wall-mounted pegboards, shelves, or hooks in small garden sheds. Ceiling-mounted racks can free up valuable floor space. Compact shelving, stackable bins, or corner shelves allow you to store tools and supplies efficiently, maximizing your shed’s limited space while keeping everything organized.

How do I keep my garden tools organized during the off-season?

During the off-season, store tools in sealed, dry bins or cabinets to protect them from dust, moisture, or damage. Consider using climate-controlled storage to prevent rust or corrosion. Label boxes or store tools in clear bins for easy access, and clean and oil them before storage.

What are the best storage solutions for extensive garden tools like lawnmowers and weed eaters?

Extensive garden tools like lawnmowers can be stored using rolling carts, shelving units, or wall-mounted hooks. If space is limited, consider ceiling-mounted racks for hanging tools. A dedicated storage shed or corner space works well for these bulky items, keeping them off the floor and easily accessible.

How can I store garden tools safely to prevent rust and decay?

Store garden tools in a dry, cool area to avoid rust and decay. Use weatherproof cabinets or bins to protect tools from moisture. Regularly clean and oil tools before storage to prevent rust. Consider a climate-controlled unit for long-term storage to ensure that tools remain in good condition.

What are some DIY storage projects for organizing garden tools?

DIY projects can include building custom shelves, racks, or pegboards to store tools efficiently. Consider repurposing wooden pallets, crates, or buckets as storage solutions. You can also design wall-mounted racks for long-handled tools, creating a personalized and functional storage system that fits your available space and tool needs.

Can I use ceiling-mounted storage for garden tools in small spaces?

Ceiling-mounted storage is ideal for small spaces, as it helps free up floor area. Install hooks or racks on the ceiling to store long-handled tools like rakes, shovels, or hoses. This method maximizes vertical space and is especially useful for storing seasonal or infrequently used items in compact areas.

How do I maintain a climate-controlled storage unit for my garden tools?

Check the temperature and humidity in your climate-controlled storage unit regularly to maintain optimal conditions for your tools. Store tools in sealed containers or protective covers to keep them dry and prevent dust buildup. Ensure adequate ventilation to avoid moisture accumulation, which can lead to rust or damage.

Best Comic Book Storage Ideas for Protecting Your Collection

Comic books are more than just stories—they are valuable collectibles that require proper care to maintain their condition and worth. Whether you’re a casual reader or a serious collector, ensuring your comic book collection is stored safely with the correct catalog, proper stacking, and thoughtful arrangement can protect it from damage caused by dust, humidity, and poor handling.

Many options exist for keeping your comics pristine, from boxes and shelves to storage units and display cases. Whether using a shelf near the floor, placing boxes at the front of a corner, or stacking items carefully so they don’t press against each other, the right amount of space and organization can make a difference. This guide will walk you through the best comic book storage ideas, including furniture solutions, archival protection, and even climate storage units to prevent deterioration. 

1. Why Proper Comic Book Storage Matters

When stored improperly, comic books can suffer from issues like creases, fading, and yellowing pages. Paper is fragile, and exposure to air, moisture, and sunlight can degrade its quality over time. Keeping them in a file cabinet or a drawer can be a good option for anyone looking for extra protection. Finding the right place for storage makes a lot of sense, whether you’re organizing the ones you read frequently or preserving valuable ones. Planning can go a long way in ensuring your collection stays in top condition, just like others who invest in proper storage solutions. 

Poor storage methods can also warp comic boxes, cause pages to stick together, or cause water damage to entire collections. The weight of improperly stacked boxes can cause bending, and placing them on their side instead of upright can make board support less effective. Over time, this can become a serious thing that damages your collection. Proper comic book storage protects your comics and makes your collection easier to organize and display. Many storage solutions are available; finding the right kind depends on your needs. The point is to ensure your comics have a safe and structured life, and you can find links to some of the best options to keep them in top condition.

2. Choosing the Right Comic Book Storage Box

One of the first things every collector needs is a proper storage box. There are different types of comic boxes, each with its benefits:

  • Cardboard boxes – Affordable and commonly used, but may wear out over time.
  • BCW storage boxes are popular among collectors for their durability and design.
  • Plastic storage boxes – Offer better protection against moisture and are ideal for long-term storage.
  • Short and long boxes – Depending on your storage unit size guide, short boxes are more manageable, while long boxes hold more comics but can be harder to move.

Always use acid-free bags with backing boards to prevent bending and deterioration when storing your comics. Keeping your collection in a storage box protects it from dust and light exposure, making this one of the best storage solutions available. Be sure to choose the proper sizes of bags and boards to fit each comic book properly. Remember that proper storage can preserve the condition of your comics for years. For example, a sturdy case can provide extra protection, especially if you store your comics in a house with varying humidity. Many stores offer specialized products for comic book storage so that you can find the best options for all your storage needs. 

3. Bookshelves and Cabinets for Comic Book Storage

If you prefer a storage solution that makes your comic book collection easily accessible, consider using bookshelves, a bookcase, or a cabinet. These furniture options are great for organizing comic books while keeping them in excellent condition. Storage methods, such as placing comics in a protective bag or ensuring their covers are shielded from dust, can help maintain their quality. Different storage space areas can be designated for specific collections, making sorting and displaying your comics easier.

Bookshelves vs. Cabinets: Which is Best?

  • Bookshelves: The open design allows for easy access, and you can separate different comic series with bins, racks, or dividers.
  • Cabinets with drawers: Protect comics from dust and light exposure while providing a neat storage unit for your collection.
  • File cabinets are a great way to store books in a storage unit upright and prevent warping, similar to how libraries store magazines.

Popular Bookshelf and Cabinet Brands for Comic Book Storage

  • IKEA bookshelves – Known for affordability and customization.
  • BCW storage solutions – Specifically designed for comic storage.
  • Custom-built shelving – Ideal for extensive collections or high-end comic book displays.

Using a bookshelf or cabinet makes your comic book collection easy to browse while ensuring protection.

4. Climate-Controlled Storage Units for Comic Preservation

For serious collectors, a climate-controlled storage unit is one of the best investments for long-term comic book storage. At McDowell Mountain Community Storage, we offer secure, temperature-controlled storage units to protect your collection from humidity, heat, and environmental damage. Whether you’re storing a few prized issues or an entire comic book collection, our facility provides the ideal space to keep your comics pristine.

Why Use a Climate Storage Unit?

  • Temperature control – Prevents paper from becoming brittle.
  • Humidity regulation – Avoids mold and mildew growth.
  • Protection from external elements – Prevents exposure to sunlight and fluctuating conditions.

If you’re unsure about the proper storage unit for your comic book collection, follow a storage unit size guide to determine the space you need.

5. Comic Book Display Solutions for Collectors

While keeping your comics in boxes or cabinets is practical, some collectors like to showcase their most prized comic book editions.

Ways to Display Comic Books

  • Wall-mounted shelves – Perfect for displaying high-value comics.
  • Comic bookcases with glass doors – Protect from dust while keeping them visible.
  • Shadow boxes or frames – Ideal for limited editions or signed comic books.

Using magazine shelving or a bookcase can turn your comic book collection into a stunning visual display.

6. Protecting Your Comics with Archival Storage

McDowell Mountain Community Storage in Scottsdale Arizona provides secure storage options for comic book collectors
Protect your valuable comic book collection with top storage solutions at McDowell Mountain Community Storage in Scottsdale Arizona

For valuable or rare comic editions, archival protection is essential. Here are some key materials to use:

  • Acid-free bags and sleeves – Prevents yellowing and paper degradation.
  • Archival storage boxes – Made with acid-free materials for maximum preservation.
  • Climate-controlled filing system – Helps maintain ideal conditions.

Using proper storage solutions reduces the risk of damage and ensures your comic book collection remains in top condition for years.

7. Sorting and Labeling for Comic Book Organization

Proper organization makes it easier to find specific comic books within your collection. Here are some tips for sorting and labeling:

  • Alphabetical order – Arranging by title ensures quick access.
  • Series and issue number – Keeps comic book collections together.
  • Filing cabinets with dividers – Great for easy browsing.
  • Labeling storage boxes – Use labels to indicate the contents of each box.

Using bins, racks, and containers makes the organization process more efficient.

8. Business Storage for Large Comic Book Collections

Consider business storage options if your comic book collection has outgrown your home. Storage units offer a secure way to keep your comics safe while freeing up space in your room.

Many collectors store their comic books in storage units when they run out of shelves, bookcases, or furniture. Be sure to choose a storage solution that protects against water, temperature fluctuations, and pests.

9. Online Communities and Reddit for Comic Book Storage Ideas

Platforms like Reddit and collector forums offer great storage solutions for more comic book collection ideas. Many collectors share tips on the best boxes, shelves, and storage unit setups.

Reddit comments often provide real-world advice on:

  • The best comic book display options
  • How to organize comic books efficiently
  • Where to find BCW boxes and magazine shelving

Engaging with the online comic community can help you refine your storage solution.

10. Final Thoughts: The Best Storage Solution for Your Collection

Keeping your comic book collection safe requires the proper storage solutions, whether it’s boxes, a cabinet, or a storage unit. Sorting, labeling, and organization make it easier to manage your comics, while archival protection ensures they remain in excellent condition.

Whether storing a few X-Men series issues or a massive comic book archive, investing in the best storage will keep your collection in shape for years.

Frequently Asked Questions

1. How do I prevent comic books from sticking together over time?

To prevent comic books from sticking together, always store them in acid-free bags with backing boards. Avoid stacking them in humid environments, as moisture can cause pages to stick. Keeping your comics in a climate-controlled storage unit or a room with stable temperature and humidity helps prevent this issue.

2. What is the best way to store oversized or graphic novel editions?

Oversized comics and graphic novels should be stored upright on bookshelves or in magazine file holders. Using adjustable dividers or bookends can help keep them in place without bending. If storing in a box, ensure it is large enough to prevent curling or damage to the covers.

3. Are plastic bins a good alternative to cardboard boxes for long-term storage?

Plastic bins offer better protection against moisture, pests, and general wear than cardboard boxes. However, ensure the bins are acid-free and adequately ventilated to avoid trapping humidity. Also, please keep them in a cool, dark space to prevent heat buildup.

4. How often should I check and reorganize my comic book storage?

You should check your collection at least once or twice a year to ensure there are no signs of mold, pests, or deterioration. If you frequently add new comics, regular sorting and labeling will help keep your collection organized.

5. What are the risks of stacking too many comics in one box or shelf?

Overstacking can cause warping, spine damage, and page compression. Heavy stacks pressure the lower comics, potentially causing creases or misalignment. Always store comics upright in sturdy boxes with dividers or spacers to keep them from pressing against each other.

6. Can I store comic books in a basement or attic without damaging them?

Basements and attics are generally not ideal due to temperature fluctuations and humidity. If you must use these spaces and store comics in airtight, acid-free containers with silica gel packets to absorb excess moisture, a climate-controlled storage unit is a better option for long-term preservation.

7. What are the best lighting options for displaying comic books without causing fading?

Use UV-protected glass frames or display cases to reduce exposure to sunlight and fluorescent lighting. LED lights are the safest option, emitting little to no UV rays and heat, minimizing damage. Avoid direct sunlight at all costs.

8. Should I remove comics from their original plastic wrap before storing them?

Factory-sealed comics should be removed from their original plastic wrap and placed in acid-free bags with backing boards. The original wrap may contain chemicals that degrade paper over time and do not adequately protect against air exposure.

9. How do I protect comics from pests like insects or rodents?

Store comics in sealed plastic bins and avoid keeping them in damp, dark areas where pests thrive. Use pest deterrents like cedar blocks or lavender sachets instead of chemical sprays. If storing in a basement or garage, check regularly for signs of insects or rodents.

10. What are the best apps or software for cataloging a comic book collection?

Popular options include CLZ Comics, Comic Book Collector, and League of Comic Geeks, which help track issues, values, and organization. Spreadsheets can also be helpful for custom cataloging, especially for extensive collections.

Maximize Your Handbag Storage with Self-Storage Units

A well-organized handbag collection can make your daily routine smoother, ensuring you always have the perfect bag for any occasion. However, finding enough space to store your purses, handbags, and bags can become a challenge as your collection grows. The proper storage solution can help you declutter, organize, arrange, and optimize your closet space, whether in an apartment or a house. Using the proper containers can maximize your storage capacity, making packing and accessing your belongings more straightforward and efficient. 

The Benefits of Self-Storage for Handbags

A self-storage unit is an excellent option for individuals who want to maintain a clutter-free wardrobe while keeping their handbags in excellent condition. Whether you need something to free up spaces in your closet or an idea for better organization, a self-storage unit can help. It provides the perfect corner to store everything safely, and this blog will guide you through the best ways to maximize your handbag storage. Here are some reasons why using storage solutions for handbags is beneficial:

  • Maximize Closet Space: A storage unit frees up valuable closet shelves to better organize everyday items.
  • Protect Handbags from Damage: A climate-controlled storage unit ensures your bags are safe from humidity, mold, and temperature fluctuations.
  • Improve Organization: A designated storage space prevents clutter and makes locating the perfect purse for any occasion easier.
  • Secure Valuable Items: Some handbags are luxury investments. Keeping them in a storage facility adds an extra layer of protection.
  • Flexible Storage Solutions: Whether you need short-term vs. long-term storage, self-storage allows you to select the best option based on your needs.

Creative Handbag Storage Ideas

If you’re looking for practical handbag storage ideas, there are many ways to store your purses and maintain a tidy closet. Whether you have limited room in an apartment or an expansive walk-in closet, these tips will help keep your handbag collection in order. Using a box to store seasonal bags, organizing clothes and shoes efficiently, and using clever storage solutions can simplify your life. A well-structured image of your storage layout offers easy access, and a storage app can help track and manage your handbag collection effortlessly. 

1. Use Closet Shelves and Dividers

One of the best storage ideas is to dedicate specific closet shelves for your bags. Use shelf dividers to keep each handbag upright, preventing it from slouching or losing shape. If you have adjustable closet shelving, customize the height to fit different bag sizes. This method ensures a neat display that anyone can easily navigate. With various shapes and styles of handbags, organizing them properly saves a lot of space while protecting your investment. Like a brand’s logo represents its identity, a well-organized closet reflects your style and storage rights.

2. Organize with Bins, Boxes, and Baskets

  • Bins and boxes help protect bags from dust and dirt while keeping them organized. You can use a bag organizer to separate different types of bags for easy access.
  • Choose clear storage bins for easy access or label opaque boxes for a neat storage solution. The right purse organizer can make all the difference in keeping everything in order.
  • Baskets can be used for casual or everyday purses, keeping them within reach for quick use. Having an organizer ensures you can grab your favorite bag in no time.

3. Utilize Wall Hooks and Racks

If you’re short on closet space, use wall hooks or a hanging rack to store handbags vertically. This method keeps bags off the floor while making them easily accessible. Whether you’re storing books or bags, utilizing your area efficiently ensures everything stays organized and within reach.

  • Install hooks on a wall or the back of a door to hang clutches and small purses.
  • Use rack-style storage to neatly line up your favorite bags.

4. Repurpose Shower Curtain Rings and Closet Rods

  • Hang bags from shower curtain rings attached to a closet rod. This method works well for storing things like bags anywhere in your closet.
  • This is an efficient way to store multiple handbags while preventing them from getting crushed. It’s also an excellent option for storing drawers of bags without adding extra weight.
  • Ideal for lightweight purses and totes, especially for people who prefer using plastic rings to keep bags organized without taking up too much space.

5. Store Seasonal Handbags in a Self-Storage Unit

Not all bags are used year-round. If you have seasonal handbags, consider storing them in a self storage facility to free up closet space.

  • Use dust bags to prevent damage, especially when storing bags for long periods. This is important for protecting your investment and keeping your handbags in excellent condition.
  • Place structured purses in compartments to maintain their shape. This storage method works well for animals that require different care or games with various information on the items inside.
  • Stack handbags in labeled boxes for easy retrieval. This helps you organize others like shoes or accessories while ensuring you can quickly find the right bag when needed.

6. Use Furniture for Hidden Storage

For a creative storage solution, incorporate multi-purpose furniture that doubles as handbag storage.

  • Ottomans with storage compartments offer a stylish and functional way to store your handbags. This option is perfect for any menu of storage ideas you want to try.
  • Under-bed bins are great for rarely used bags. These bins can be tucked away, saving space in your bedroom while keeping your bags in good condition.
  • Shelving units with built-in organizers provide an excellent choice for storing handbags and keeping them visible. You can choose a color that matches your room’s decor for a more personalized look, making the most out of your storage space.

7. Store Luxury Handbags Securely

High-end handbags require special care to maintain their value. Use the following storage solutions for designer purses:

  • Climate-controlled storage units to prevent humidity damage.
  • Boxes with acid-free tissue paper to maintain structure.
  • Drawer storage with soft lining for delicate materials.
  • Storage bins with silica gel packets to absorb excess moisture.
Maximize Your Handbag Storage with Self-Storage Units at McDowell Mountain Community Storage in Scottsdale, Arizona
Explore how McDowell Mountain Community Storage in Scottsdale, Arizona, offers the perfect self-storage units to help you organize and protect your handbag collection

How to Choose the Right Self-Storage Unit for Handbags

When selecting a self-storage unit for your handbags, consider the following factors:

1. Storage Size Guide

Choose the perfect storage unit for your handbag collection with our Storage Size Guide. From small units for a few bags to large units for your entire collection, find the right fit for your needs! 

  • Small Units (5×5 feet): Ideal for a modest handbag collection, boxes, bins, and small storage organizers.
  • Medium Units (5×10 feet): Provides space for multiple purse organizers, shelves, and additional items.
  • Large Units (10×10 feet and up): Best for storing an extensive handbag collection, clothing, furniture, and other storage solutions.

2. Climate-Controlled Storage Units vs. Standard Units

  • Climate-controlled storage units regulate temperature and humidity, protecting bags from damage.
  • Standard units are suitable for short-term storage but may expose handbags to environmental changes.

3. Short-Term vs. Long-Term Storage

  • If you’re remodeling or organizing, short-term storage is a great option to free up closet space.
  • For a permanent storage solution, a long-term storage unit ensures your handbags remain pristine.

4. Accessibility and Security

  • Look for a storage facility with 24/7 access so you can retrieve bags whenever needed.
  • Choose a secure location with surveillance cameras and gated access.

Storage Tips for Keeping Handbags in Excellent Condition

To keep your handbag collection looking new, follow these storage tips:

  • Clean bags before storing them to prevent stains.
  • Stuff bags with tissue paper to maintain their shape.
  • Rotate handbags seasonally to avoid wear and tear.
  • Keep bags in dust bags for added protection.

Common Handbag Storage Mistakes to Avoid

  • Stacking handbags on top of each other – This can lead to deformities.
  • Ignoring humidity control – Moisture can cause mold and material damage.
  • Overloading closet shelves – This can crush softer handbags.

Why Choose McDowell Mountain Community Storage?

At McDowell Mountain Community Storage, we offer high-quality self-storage solutions for handbag collectors. Our climate-controlled storage units, various sizes, and top-tier security make us the best option for keeping your handbags in excellent condition. With easy-access doors and well-maintained posts for organization, we ensure that your handbags are stored securely. Whether you’re storing a small or an extensive collection, our name is trusted to provide the best thing for preserving your valuable handbags.

Our Storage Solutions Include:

Final Thoughts: Organize, Declutter, and Optimize Your Handbag Storage

Finding the proper storage solution for your handbag collection can transform your closet and free up valuable space. Whether you’re organizing a few purses or a vast handbag collection, a self-storage facility can provide the protection, convenience, and efficiency you need.

We understand the value of proper storage and organization at McDowell Mountain Community Storage. Contact us today to find the perfect self-storage unit for your handbags and enjoy a clutter-free wardrobe!

Frequently Asked Questions

Is storing leather handbags in a self-storage unit safe for long periods?

Yes, as long as you use climate-controlled storage, which helps prevent humidity and temperature changes that can damage leather.

Can I store bags in plastic bags or containers for a long time?

While plastic bags offer dust protection, they can trap moisture. For long-term storage, it’s better to use breathable fabric dust bags or climate-controlled units.

How often should I check on my handbags stored in a self-storage unit?

It’s advisable to check on your handbags every 3 to 6 months to ensure that they remain in good condition and that no environmental issues have affected them.

Can I store handbags with clothes and shoes in the same storage unit?

Yes, but make sure to store handbags in separate, labeled bins or boxes to avoid them getting scratched or damaged by other items.

What is the best temperature range for storing handbags in a self-storage unit?

Ideally, the temperature should be between 60°F and 75°F (15°C and 24°C) to prevent material damage.

Is it better to store handbags upright or lying in a self-storage unit?

For structured handbags, it’s best to store them upright to maintain their shape. Soft bags can be stored lying down if necessary.

How can I protect my handbags from dust while storing them in a self-storage unit?

Use dust bags or place them in clear plastic bins to prevent dust accumulation and keep them in excellent condition.

Can I store handbags in a regular (non-climate-controlled) self-storage unit?

While it’s possible, non-climate-controlled units may expose your handbags to humidity, extreme temperatures, or other elements that could damage them over time. Climate-controlled units are a better option.

How do I prevent my handbags from getting deformed when stored in a self-storage unit?

Stuff them with soft materials like tissue paper or bubble wrap to help maintain their shape during storage.

Should I keep my handbags in the original dust bags provided by the brand?

Yes, using the original dust bags is an excellent way to protect handbags from dirt and moisture while in storage.